
If you have ever left your phone on the kitchen counter and gone for a run, you already know the problem. No calls, no texts, no Maps if you take a wrong turn. An Apple Watch with cellular fixes that, but only if you actually set up the eSIM on it first. A lot of people buy the “GPS + Cellular” version and never activate the cellular part, because the setup isn’t exactly obvious the first time.
This guide walks through the whole process from start to finish — what you need before you begin, the exact steps, what usually goes wrong, and whether it’s even worth paying for a watch line in the first place.
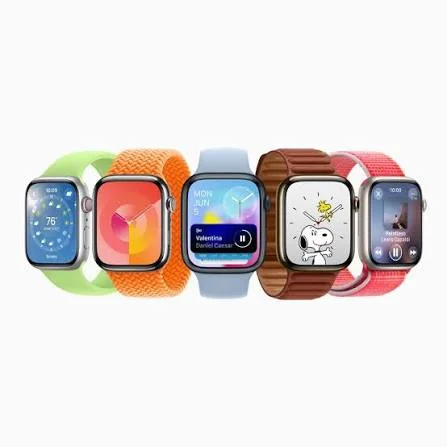
Setting up an eSIM on your Apple Watch is one of the easiest ways to stay connected without relying on your iPhone. In 2026, most Apple Watch models with cellular support allow you to download and activate an eSIM directly through your paired iPhone, enabling you to make calls, send messages, stream music, and use apps even when your phone isn’t nearby.
Before you begin, make sure your Apple Watch supports cellular connectivity, your iPhone is running the latest version of iOS, and your mobile carrier offers Apple Watch eSIM service. While the setup process is generally straightforward, the exact steps may vary slightly depending on your carrier and region.
In this guide, you’ll learn how to download an eSIM on your Apple Watch in 2026, including the requirements, step-by-step setup instructions, troubleshooting tips, and solutions to common activation issues. Whether you’re setting up a new Apple Watch or transferring your cellular plan to a new device, this guide will help you get your eSIM up and running quickly and securely.
What an eSIM on Apple Watch Actually Is
An eSIM is a SIM card that lives inside the watch’s hardware instead of sliding into a tray. There’s no physical chip to insert or remove. Your carrier sends the SIM profile over the internet, and it gets written directly onto a small embedded chip inside the watch.
Every Apple Watch sold as “GPS + Cellular” has this chip built in. The plain GPS-only models don’t — there’s no cellular radio inside them at all, so no setup trick or software update will ever add one. This has been true since the Series 3 launched back in 2017, and it still applies to the newer Ultra and SE lines.
An easy way to check which one you own: look at the Digital Crown. Cellular models usually have a small red ring or red dot on it. If you’re not sure, open the Watch app on your iPhone, go to General, then About — a cellular model will show an EID number listed there. GPS-only models won’t have one.
What You Need Before Starting
Before you open the Watch app and start tapping around, make sure you actually have these three things ready:
- A cellular Apple Watch (GPS + Cellular, not GPS-only)
- A paired iPhone running a reasonably current version of iOS
- An active plan with a carrier that supports Apple Watch cellular
That third point trips up more people than you’d expect. Not every mobile carrier offers Apple Watch plans, even in countries where the watch itself is sold. In the US, all three major carriers — AT&T, T-Mobile, and Verizon — support it, along with several smaller ones like US Mobile. In India and a number of other markets, watch cellular support is patchy at best, so it’s worth calling your carrier directly and asking whether they offer a “wearable” or “companion” line before you assume it’ll just work.
One thing to know upfront: this isn’t like adding a travel eSIM to your iPhone. You can’t scan a QR code and load a random data plan onto your watch. Apple only allows carrier-approved profiles through the Watch app, so third-party eSIM providers that work great on phones simply don’t work on Apple Watch.
Step-by-Step: Setting Up the eSIM
Here’s the actual process, step by step.
Step 1: Open the Watch app on your iPhone
Not the watch itself — setup happens entirely from your phone. Look for the app with the watch-face icon.
Step 2: Go to the Cellular tab
Tap “My Watch” along the bottom, then tap “Cellular.” If you’re pairing a brand-new watch for the first time, this same prompt usually pops up automatically partway through setup, so you won’t need to dig for it.
Step 3: Tap “Set Up Cellular”
This hands you off to your carrier’s own plan screen inside the app.
Step 4: Log in and pick a plan
You’ll be asked to sign in to your carrier account. From there, choose the plan you want — most carriers give you a choice between sharing your iPhone’s existing number with the watch, or setting up the watch as its own separate line.
Step 5: Agree to the terms and fee
Some carriers charge a small monthly fee for number-sharing, usually somewhere between $5 and $15 depending on the carrier. Review this before confirming.
Step 6: Wait for the profile to download
This is the part where patience matters. The eSIM profile downloads over the internet, so a stable Wi-Fi connection actually matters more than your phone’s signal strength at this stage. It usually takes one to five minutes, though some carriers queue the activation and it can take a little longer.
Step 7: Confirm the connection
Once it’s done, you’ll get a notification — some carriers send it as a text to the watch, others as a pop-up on the iPhone. Go to Settings on the watch, then Cellular (or open Control Center by pressing the side button), and look for the signal icon. A green icon means you’re connected. A white or grey one means the watch is still relying on Wi-Fi or your phone.
For example, say you’re on Verizon and want your watch to share your existing iPhone number. You’d pick “Number Share” during Step 4, agree to the $10-ish monthly add-on fee, and within a few minutes your watch shows the same signal bars as your phone. From that point, if your phone is in another room — or another building entirely — texts and calls still come through on the watch.
Changing Carriers or Adding a Travel Plan
If you travel and want to avoid roaming charges, know this ahead of time: you can’t just buy a travel eSIM and load it onto the watch the way you would on an iPhone. Apple Watch cellular is locked to plans provisioned by carriers that specifically support wearables, and roaming abroad depends entirely on whether your home carrier has an international add-on for the watch.
A few real examples of how carriers handle this:
- AT&T NumberSync offers an International Day Pass for around $12 a day, shared with your iPhone plan, working in 35-plus countries.
- T-Mobile DIGITS includes free (if slow) international data in a large number of countries, with paid high-speed passes available.
- Verizon Number Share works with TravelPass, typically $10 to $14 a day when abroad.
If your carrier doesn’t offer international watch roaming at all, your watch simply won’t have cellular service overseas — it’ll fall back to acting like a GPS-only model, relying on Bluetooth to your iPhone or a known Wi-Fi network.
Common Setup Problems and Fixes
Most eSIM activation issues aren’t actually about the watch hardware — they’re about the carrier side. Here’s what tends to go wrong:
“Unable to Complete Cellular Setup” message This usually means the carrier’s servers are lagging, or your billing details weren’t accepted. Restart both devices and try again after a few minutes.
Setup finishes but there’s no signal The profile downloaded fine, but the watch can’t actually connect. This is often a weak signal, wrong network band for your region, or the plan wasn’t fully provisioned on the carrier’s end.
No “Set Up Cellular” option appears at all Double check you actually have a GPS + Cellular model. If you do, make sure both the iPhone and watch are updated to their latest software versions.
Still stuck after retrying Call your carrier directly, skip the general customer support script, and ask specifically for the watch’s EID number (Settings > General > About on the watch). Tell them you need the wearable line reprovisioned — this resolves the majority of stubborn cases.
Is an Apple Watch Cellular Plan Worth It?
Before you commit to a monthly fee, it helps to weigh what you’re actually getting.
Pros:
- You can leave your phone at home and still take calls, reply to texts, and stream music
- Genuinely useful for runners, swimmers, and anyone who doesn’t want to carry a phone during workouts
- Works as a backup connection if your phone battery dies or gets lost mid-day
- Setup takes just a few minutes once your carrier plan is active
- No physical SIM card to lose or swap
Cons:
- Adds a recurring monthly cost on top of your existing phone plan
- Battery life on cellular is noticeably shorter than Bluetooth-only mode
- Not every carrier supports it, especially outside a handful of major markets
- Can’t use third-party travel eSIMs — you’re locked into carrier-approved plans only
- If your paired iPhone is lost, you can only manage the plan again once you’ve unpaired the watch through iCloud and paired it with a replacement phone
For a lot of people — commuters, gym regulars, parents keeping tabs on kids without a phone — the convenience easily justifies the extra few dollars a month. For others who rarely leave their phone behind, it’s a cost that sits unused most of the time.
Frequently Asked Questions
Does every Apple Watch support eSIM?
No. Only models sold as “GPS + Cellular” have the embedded chip. GPS-only versions have no cellular radio at all, regardless of software updates.
Can I use a travel eSIM from providers like Airalo or Holafly on my Apple Watch?
No. Apple Watch cellular only works with carrier-provisioned plans set up through the Watch app. Third-party travel eSIMs that work fine on phones aren’t supported on the watch.
Does the Apple Watch get its own phone number?
Usually not, unless you specifically choose a standalone line during setup. Most people share their existing iPhone number with the watch through Number Share, NumberSync, or DIGITS, depending on the carrier.
How long does the eSIM download take?
Typically one to five minutes on a stable Wi-Fi connection. Some carriers queue activation, which can occasionally push it longer.
What happens if I lose my iPhone but still have my watch?
You can make calls and use apps that work independently, but you can’t change or remove the cellular plan without a paired iPhone. You’d need to unpair the watch through iCloud and pair it to a new phone to manage settings again.
Can I switch which line my watch uses if I have dual SIM on my iPhone?
Yes. Open the Watch app, go to My Watch, tap Cellular, and under Cellular Plan you can choose which of your iPhone’s lines the watch should mirror.
Does using cellular on my Apple Watch drain the battery faster?
Yes, noticeably. Cellular connections use more power than Bluetooth, so expect shorter battery life on days you’re relying on the watch’s own signal instead of your paired phone.
Conclsion
Setting up an eSIM on Apple Watch isn’t complicated once you know the sequence — Watch app, Cellular tab, pick a plan, wait a few minutes. The part that actually catches people out is carrier support, not the technical steps themselves. Check with your carrier first, confirm your watch is the cellular version, and the rest of the process takes less time than it took to read this article.