
How to Download an eSIM on a Standalone Apple Watch
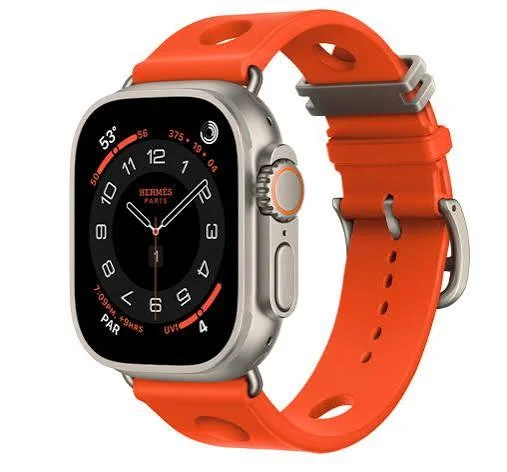
If you’re trying to set up a cellular Apple Watch that works completely on its own — no iPhone required for day-to-day use — you’re looking for what Apple calls “standalone” cellular setup. This is different from the usual Apple Watch experience where your watch just mirrors whatever’s happening on your iPhone.
A standalone setup means your watch can make calls, send texts, and use data entirely on its own, whether that’s for a kid without a phone yet, someone going phone-free, or just anyone who wants their watch to be genuinely independent.
Here’s the part that trips people up: you can’t activate a brand-new Apple Watch cellular plan without using an iPhone at least once, even for a “standalone” setup. The good news is that once that one-time activation is done, your watch really can run on its own from that point forward. This guide walks through exactly how to do it, what you need, and what to expect once it’s live.
What “Standalone” Actually Means Here
A lot of people search for this thinking there’s some secret trick to skip the iPhone entirely. There isn’t — at least not yet. What “standalone” really means is:
- The initial setup requires access to an iPhone, either your own or a family member’s, running the Watch app.
- Once activation is complete, the watch operates independently afterward, making calls, sending messages, and using data with no iPhone nearby, no Bluetooth connection needed, nothing.
If you’re setting this up for yourself, you’ll use your own iPhone once, and then you’re free to leave it at home going forward. If you’re setting it up for a family member — say, a kid who doesn’t own an iPhone — Apple has a specific pathway for that called Apple Watch For Your Kids (previously known as Family Setup), which lets an adult’s iPhone manage the activation on behalf of someone else’s watch.
What You’ll Need Before You Start
Getting this right the first time saves a lot of back-and-forth. Here’s the checklist:
- A GPS + Cellular Apple Watch model. This is non-negotiable. GPS-only models look identical to the cellular versions but physically don’t have the modem or eSIM chip needed for standalone service. No setup trick changes that — the hardware simply isn’t there.
- A quick way to check your model: look at the Digital Crown. Cellular Apple Watches have a small red ring or red dot on the crown; GPS-only models leave it plain. You can also confirm in the Watch app under General, then About — a cellular model will list an EID number.
- An iPhone with the latest iOS, either your own or the managing family member’s phone, with the Watch app installed.
- An active cellular plan with a carrier that supports Apple Watch. Not every carrier does, and prepaid or older accounts sometimes aren’t supported either. Worth checking with your carrier before you buy anything.
- A stable Wi-Fi connection. The eSIM profile downloads over the internet, so a good Wi-Fi connection actually matters more at this stage than your cell signal.
- Your Apple ID and password, since the watch needs to be signed in for setup to complete.
Step-by-Step: Setting Up Cellular for Your Own Watch

If you’re the one wearing the watch and you already have an iPhone, this is the more straightforward path.
Step 1: Pair your Apple Watch with your iPhone (if it isn’t already), and make sure both devices are charged and connected to Wi-Fi.
Step 2: Open the Watch app on your iPhone. It’s the app with the watch-face icon.
Step 3: Tap the “My Watch” tab, then tap Cellular.
Step 4: Tap “Set Up Cellular” and follow the prompts. You’ll typically be redirected to log in with your carrier account or select a plan.
Step 5: Review the terms, fees, and any number-sharing charge. Many carriers charge a small monthly fee, often somewhere between $5 and $10 USD, to add a watch line to your existing plan.
Step 6: Confirm and wait. The eSIM profile downloads to your watch over the next few minutes — it’s not instant, so don’t panic if nothing happens right away.
Step 7: Check the signal. Once setup finishes, look for the cellular icon in Control Center on your watch (press the side button to open it). A green icon means the watch is actively connected to a cellular network on its own. A white icon means it’s ready but currently piggybacking off Wi-Fi or your iPhone’s connection instead.
At that point, you’re done. You can leave your iPhone at home, and your watch will keep working.
Step-by-Step: Setting Up a Standalone Watch for Someone Without an iPhone

This is the path most people mean when they search for “standalone Apple Watch” — usually setting one up for a child, an older parent, or anyone who wants a phone-free device that still stays connected.
Step 1: Make sure the managing adult’s iPhone is set up and signed in, with both devices charged and on Wi-Fi.
Step 2: Open the Watch app on the managing iPhone, and start pairing the new Apple Watch.
Step 3: When prompted, choose “Set Up for a Family Member” (this is the Apple Watch For Your Kids flow). Follow the prompts to create or link the family member’s Apple ID, and set up Screen Time if you want those controls.
Step 4: Choose Cellular, then “Set Up Cellular.” Pick a compatible plan for the watch’s own number — this is usually a separate line added to the family plan rather than something shared with the managing iPhone.
Step 5: Complete activation, and test it by placing a call directly from the watch before you consider the setup finished.
Once this is done, the organizer’s iPhone doesn’t need to be nearby for day-to-day use. The watch has its own number and its own connection.
A Practical Example
Say you’re setting this up for your 11-year-old who doesn’t have a phone yet, but you want them to be reachable at school or on the way home. You’d use your own iPhone to run through the Apple Watch For Your Kids setup, add a line on your existing family plan (most major carriers offer a discounted rate for an additional watch line), and finish activation while both devices are on your home Wi-Fi.
From that point on, your kid wears the watch to school with no phone in their backpack. They can call you, you can call them, and they get notifications you’ve approved — all without carrying an iPhone at all. If they’re at soccer practice and you need to reach them, you’re calling the watch directly, not routing through a phone that isn’t there.
What Happens With Travel eSIMs

This is a common point of confusion, so it’s worth addressing directly: a typical travel eSIM from providers like Airalo or Nomad usually cannot be installed directly onto an Apple Watch. Apple Watch cellular is provisioned specifically by carriers that support the watch, not through the same QR-code eSIM installs you’d use on an iPhone.
If you’re traveling and want your watch to stay connected independently abroad, you generally need to check whether your existing Apple Watch carrier supports international roaming for wearables — and be aware that roaming charges for a watch plan can be steep and coverage may be more limited than what your iPhone gets. For most travelers, the simpler and cheaper option is installing a travel eSIM on the iPhone instead and keeping the watch nearby so it piggybacks off the phone’s connection over Bluetooth.
Pros and Cons of Standalone Cellular Setup
Pros:
- True independence — calls, texts, streaming, and navigation work directly from the wrist with no phone nearby
- Great option for kids who need to be reachable but aren’t ready for a full smartphone
- Useful for workouts, runs, or swims where carrying a phone is inconvenient
- Digital minimalism appeal — some adults use it specifically to leave their phone behind more often
- Emergency features like calling for help still work even if the phone is left at home or has died
Cons:
- Initial setup still requires an iPhone at least once — there’s no way around this currently
- Battery drains noticeably faster on cellular than when connected via Bluetooth to a nearby iPhone, often 20–30% more power used
- Monthly add-on fee from your carrier, typically $5–$15, on top of whatever you’re already paying for your phone plan
- Not all carriers support Apple Watch cellular, and prepaid accounts are often excluded
- Some SMS, MMS, and third-party app notifications still require a paired iPhone to be powered on and connected somewhere, even if it’s not physically nearby
- Travel eSIMs don’t work directly on the watch, so international connectivity takes extra planning
Frequently Asked Questions
Can I set up an Apple Watch without ever using an iPhone?
No, not currently. Full activation of a new cellular plan requires an iPhone at least once, either your own or a family member’s, through the Watch app. After that one-time setup, the watch can run independently.
What’s the difference between GPS and GPS + Cellular models?
GPS-only models can track workouts, show notifications, and store some data, but they have no cellular modem or eSIM chip, so they always need to be near a paired iPhone or connected Wi-Fi to send or receive anything in real time. GPS + Cellular models have the built-in eSIM and modem needed for standalone connectivity.
Does my Apple Watch get its own phone number?
It depends on the setup. If you’re sharing your own line, the watch typically uses your existing number for calls and texts. With Apple Watch For Your Kids, the watch usually gets its own separate number tied to the family plan.
Can I install a travel eSIM directly on my Apple Watch?
Generally, no. Most travel eSIM providers only support phones and tablets, not the Apple Watch’s cellular provisioning system. Your best bet abroad is a travel eSIM on your iPhone with the watch nearby, or checking if your existing Apple Watch carrier supports international roaming.
How much does adding cellular to an Apple Watch typically cost?
Most carriers charge a monthly add-on fee, often in the $5 to $15 range, for a watch line, either as a number-sharing plan or a separate line depending on your carrier and setup type.
Will using cellular on my watch drain the battery faster?
Yes, noticeably. Maintaining a direct connection to a cell tower takes more power than connecting via Bluetooth to a nearby iPhone. Expect shorter battery life meaningfully on days you’re relying on standalone cellular versus days your phone is close by.
Can any Apple Watch be used for Apple Watch For Your Kids?
It needs to be a GPS + Cellular model, generally Series 4 or newer, and you’ll need access to a managing adult’s iPhone to complete setup and manage settings like Screen Time going forward.
Conclusion
Setting up standalone cellular on an Apple Watch isn’t quite the phone-free magic trick it sounds like — you’ll still need an iPhone for that one-time activation, whether it’s your own or a family member’s. But once that step is done, the payoff is real: a watch that makes calls, sends texts, and streams music entirely on its own, no phone required for the rest of the day.
Whether you’re setting this up for yourself to leave your phone at home more often, or for a kid who needs to stay reachable without a full smartphone, the process is straightforward as long as you’ve got a GPS + Cellular model and a carrier that supports it. Just keep an eye on battery life and that monthly add-on fee, and you’re set.

