

The Samsung Galaxy S26 is here, and if you’ve just unboxed yours, you might be wondering about that “eSIM” feature everyone’s talking about. Whether you’re traveling abroad, want to separate work and personal numbers, or are simply tired of fumbling with tiny physical SIM cards, setting up an eSIM on your S26 is easier than you think.

Adding an eSIM to the Samsung Galaxy S26 is a convenient way to activate a mobile plan without using a physical SIM card. Whether you are switching from a physical SIM, adding a second mobile number, or activating a travel eSIM, the Samsung S26 provides built-in eSIM support on compatible models and carriers. In this guide, we’ll explain how to add an eSIM on the Samsung S26, where to find the eSIM settings, how to scan your carrier’s QR code, and what to do if the eSIM does not activate properly. Follow the steps below to get your eSIM connected quickly and securely.
Add an eSIM on Samsung S26 will walk you through exactly how to add an eSIM on your Samsung S26, step by step. No technical jargon, no confusing instructions—just plain English that actually makes sense.
First — Does the Samsung Galaxy S26 Support eSIM?
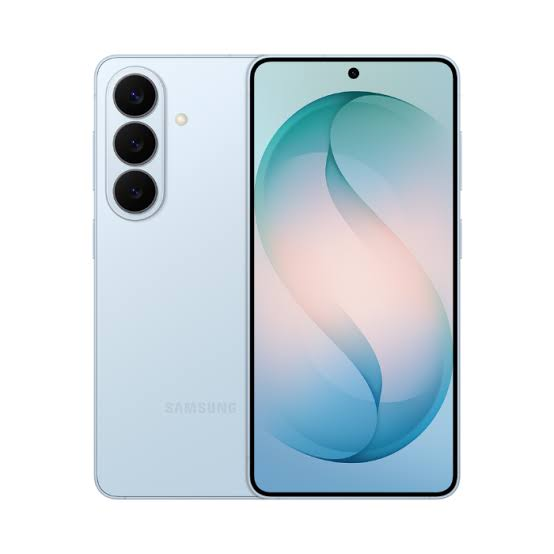
Yes, it does. The entire S26 lineup — standard Galaxy S26, S26+, and S26 Ultra — comes with eSIM support built in. Samsung officially confirmed this on their India support page, listing all three variants as eSIM-compatible.
A few things worth knowing before you proceed:
- The phone must be unlocked. Carrier-locked models may block eSIM activation during the first few months of use. If you bought it on an EMI plan through a carrier, contact them first.
- China/Hong Kong variants don’t support eSIM. If your S26 was purchased in mainland China, Hong Kong, Taiwan, or Macao, the eSIM option simply won’t appear in settings. This is a hardware-level restriction.
- You’ll need a stable Wi-Fi connection. The eSIM profile downloads from the internet. Poor hotel Wi-Fi or airport networks often cause setup failures, so use your home network if possible.
- The phone runs Android 16 with One UI 8.5 — the eSIM menu paths in this guide match that software version.
The S26 can store up to 8 eSIM profiles and run 2 simultaneously. So you can keep a physical Jio SIM in the tray while adding an Airtel eSIM or a travel eSIM on top — all active at the same time.
What You Need Before Adding an eSIM
Before opening Settings, get these ready:
- An eSIM plan from a supported carrier — Jio, Airtel, and Vi (Vodafone Idea) all support eSIM in India on compatible devices. Contact your carrier’s customer care or visit their app to request eSIM activation.
- A QR code — Your carrier will send this via email or SMS, or display it in their app. This is the key you’ll scan during setup.
- Your activation code (optional) — If you can’t scan the QR code, your carrier will also provide a manual activation code (SM-DP+ address + activation code string).
- Stable Wi-Fi — Don’t try this on mobile data. The eSIM profile download needs a reliable internet connection.
- A second device (optional but helpful) — If the QR code arrives on the same phone, you’ll need to view it on another screen or use the gallery scan method explained below.
What Exactly Is an eSIM on the Samsung S26?

Before we jump into the setup process, let’s clear up what we’re actually dealing with. An eSIM (embedded SIM) is a digital version of that little plastic card you’ve been swapping between phones for years. Instead of physically inserting a SIM card, your Samsung S26 has a small chip built right into the motherboard that can be programmed with your carrier’s information.
Think of it like this: your physical SIM card is like a key to your carrier’s network. An eSIM is like having that key stored digitally on your phone. You can switch carriers, add travel plans, or manage multiple phone numbers without ever touching a tiny piece of plastic again.
The Samsung S26 takes this further with improved eSIM management, allowing you to store more profiles than ever before and switch between them with just a few taps.
Before You Start: What You’ll Need
Let me save you some headache. Before diving into the setup, gather these things first:
- A working Wi-Fi connection – You’ll need internet access during setup
- Your eSIM activation details – This usually comes as a QR code from your carrier or a manual activation code
- Your Samsung S26 fully charged – Keep it above 50% to avoid interruptions
- Your carrier account information – Some carriers require account verification
I learned the hard way that trying to set up an eSIM with a dying battery and spotty Wi-Fi is a recipe for frustration. Do yourself a favor and knock these prerequisites out first.
How to Add an eSIM on Samsung S26: Step-by-Step Methods
Method 1: Setting Up Through Your Carrier’s App
Many carriers now offer app-based eSIM activation, which is probably the smoothest way to get started. Here’s how:
- Download your carrier’s official app from the Google Play Store
- Log in to your account – Make sure you have your username and password handy
- Look for the eSIM activation option – Usually found in account settings or under “Manage Plan”
- Follow the on-screen prompts – The app will typically handle everything automatically
- Restart your phone once the process completes
This is by far my preferred method because it requires almost zero manual input. The app communicates directly with Samsung’s eSIM system and handles all the technical bits behind the scenes.
Method 2: Scanning the QR Code
If your carrier gave you a physical QR code or sent one via email, here’s how to scan it:
- Open Settings on your Samsung S26
- Tap on Connections – It’s usually the first option
- Select SIM Manager – You’ll see this listed under “SIM Card Manager” on some models
- Tap on Add eSIM or “Add Mobile Plan”
- Select Scan QR Code – Your camera will open
- Position the QR code within the frame until it’s recognized
- Review the plan details and tap “Confirm” or “Add”
- Wait for activation – This usually takes 1-2 minutes
Quick tip: Make sure you’re in a well-lit area when scanning. I once spent ten minutes trying to scan a QR code in dim lighting, only to realize I just needed to turn on a lamp.
Method 3: Manual Entry (When QR Code Won’t Scan)
Sometimes QR codes get damaged, or your carrier sends you a numeric code instead. Here’s how to add an eSIM manually:
- Go to Settings > Connections > SIM Manager
- Tap Add eSIM
- Select Enter Activation Code instead of scanning
- Type in the SM-DP+ Address and Matching ID provided by your carrier
- Enter the Activation Code – This is usually the long string of numbers and letters
- Tap Confirm and wait for the setup to complete
This method requires a steady hand and careful typing. One wrong character and you’ll get an error message. I usually copy-paste from the email or text message my carrier sent to avoid typos.
Managing Multiple eSIMs on Your Samsung S26
One of the best features of the S26 is its ability to handle multiple eSIM profiles simultaneously. Here’s how to make the most of this:
Switching Between eSIMs
- Open Settings > Connections > SIM Manager
- You’ll see all your active eSIMs listed
- Tap the one you want to use as your primary
- Toggle “Use as Primary” or “Set as Primary SIM”
- The phone will switch networks automatically
Renaming Your eSIMs
If you have multiple eSIMs (like one for work and one for personal use), you can rename them:
- Go to SIM Manager
- Tap the eSIM you want to rename
- Tap the pencil icon or “Edit” next to the name
- Type your new label
- Save the changes
I keep mine labeled clearly – “Personal Plan,” “Work Plan,” and “Travel – Japan” so there’s no confusion when I’m switching between them.
Removing an eSIM
Planning to sell your phone or switch carriers permanently? Here’s how to remove an eSIM:
- Open Settings > Connections > SIM Manager
- Tap the eSIM you want to remove
- Select “Remove” or “Delete”
- Confirm your choice – This can’t be undone
Troubleshooting Common Samsung S26 eSIM Problems
Let’s be honest – things don’t always go smoothly. Here are the most common issues I’ve encountered and how to fix them:
QR Code Won’t Scan
If your camera isn’t picking up the QR code:
- Clean your camera lens – Sounds obvious, but fingerprints ruin scans
- Increase brightness – The QR code might be too dark
- Hold the phone further back – Too close and it won’t focus
- Request a new QR code from your carrier if it’s damaged
“No Service” After Setup
Nothing is more frustrating than going through the whole setup process only to see “No Service.” Try these fixes:
- Restart your phone – Seriously, this fixes about 80% of issues
- Check carrier settings – Go to Settings > Software Update > Download and Install
- Toggle Airplane Mode – Turn it on for 10 seconds, then off
- Check if your plan is active – Sometimes carriers have activation delays
- Reset network settings – Settings > General Management > Reset > Reset Network Settings
eSIM Not Showing Up in SIM Manager
If you can’t even find the eSIM option:
- Check if your S26 is unlocked – Locked phones sometimes hide eSIM features
- Update your phone – Samsung frequently adds improvements through updates
- Check compatibility – Make sure your carrier supports eSIM on Samsung devices
eSIM vs. Physical SIM: Which Should You Choose?
Let’s break this down practically. Here are the real-world pros and cons:
Pros of Using eSIM:
- No lost SIM cards – I’ve lost two physical SIMs while traveling, and it’s a nightmare
- Easy carrier switching – Change providers without waiting for a new SIM to arrive
- Dual numbers – Great for separating work and personal life
- Travel-friendly – Add local data plans while keeping your home number active
- Environmentally friendly – Less plastic waste
- Permanent connection – No SIM tray failures down the road
Cons of Using eSIM:
- Not all carriers support it – Especially smaller local providers
- Harder to switch phones – You can’t just pop the card into a new device
- Activation can be trickier – Physical SIMs are foolproof
- Takes up digital space – You can only store so many profiles
- Carrier-specific issues – Some carriers’ activation systems are buggy
International Travel with eSIM on Samsung S26
This is where eSIM really shines, and it’s the reason I completely switched over. When you travel internationally, you’ve got options:
Using Local Data Plans
Instead of paying exorbitant roaming fees:
- Research local eSIM providers in your destination country
- Purchase a plan before you leave or when you arrive
- Scan the QR code or use the provider’s app
- Set it as your secondary SIM for data
- Keep your primary SIM active for calls and texts
Keeping Your Home Number Active
The Samsung S26 lets you use:
- Primary SIM (could be physical or eSIM) for your home number
- Secondary eSIM for local data in the country you’re visiting
This way, you can still receive important calls on your regular number while using affordable local data for maps, messaging, and browsing.
How to Transfer eSIM to a New Samsung S26
Got a new phone? Here’s how to move your eSIM:
Option 1: Carrier App Transfer
- Open your carrier’s app on the old phone
- Look for “Transfer eSIM” or “Move to New Device”
- Follow the prompts – Usually involves generating a temporary code
- Scan the code with your new Samsung S26
Option 2: Manual Reinstallation
- Contact your carrier – They can issue a new QR code
- Scan the QR code on your new device
- Remove the eSIM from your old phone after confirming it works
Important note: You can’t just copy an eSIM from one phone to another like a file. You’ll need to go through the activation process again on your new device.
Security Features and Considerations
Your eSIM contains sensitive network credentials, so Samsung has built in several security layers:
PIN Protection
You can set a PIN for your eSIM:
- Go to SIM Manager
- Tap the eSIM you want to protect
- Select “Set SIM PIN”
- Choose a 4-8 digit PIN
- Enter it every time you restart your phone
Remote Management
If your phone gets lost or stolen:
- Log into your Samsung account
- Use Find My Mobile
- Lock or erase your eSIM remotely
- Contact your carrier to suspend service immediately
Real-World Example: Setting Up eSIM for Travel
Let me walk you through a practical scenario that might sound familiar. My cousin Maya travels to Europe every year for work, and she used to spend a fortune on roaming. Last time she used eSIM:
- Before leaving: She downloaded the carrier’s app and logged in
- During her layover: She purchased a 10GB data plan for Europe
- At her destination: Opened the app, tapped “Activate eSIM”
- Received an activation QR code instantly in the app
- Scanned it with her Samsung S26 – took about 30 seconds
- Set it as her primary data SIM while keeping her home SIM for calls
Total time: About 5 minutes. Savings compared to roaming: Over $100.
FAQs About Adding an eSIM on Samsung S26
Can I use both an eSIM and a physical SIM simultaneously on the S26?
Yes, absolutely. The Samsung S26 supports dual SIM functionality with one physical SIM and one eSIM active at the same time. You can also use two eSIMs at once if your carrier supports it.
How many eSIMs can I store on the Samsung S26?
You can store up to 20 eSIM profiles on the S26. However, only one can be active at a time (unless you’re using dual SIM). This is great for travelers who collect plans from different countries.
Will adding an eSIM delete my physical SIM data?
No, adding an eSIM doesn’t affect your physical SIM at all. They’re completely separate and can work together or independently.
Do I need to remove my physical SIM to use eSIM?
Not at all. You can use both. Many people keep their physical SIM for their main number and use eSIM for data or a secondary number.
Is eSIM better than a physical SIM for gaming?
There’s no difference in network performance between eSIM and physical SIM. Both provide the same speed and latency. The only difference is how they’re installed.
What happens if my S26 dies and I need my eSIM?
Your eSIM profile is tied to your phone’s hardware. If your phone dies or you get a new one, you’ll need to transfer or reactivate your eSIM through your carrier. Keep backup QR codes or activation details in a safe place.
Can I use eSIM without internet connection?
You need Wi-Fi or mobile data to download the eSIM profile initially. Once installed, the eSIM works independently of Wi-Fi.
Does using eSIM drain battery faster?
Not really. The eSIM chip is extremely efficient. Any battery difference compared to a physical SIM is negligible and usually due to network conditions rather than SIM type.
Can I add an eSIM that my employer provides?
Yes, most corporate eSIM plans work on the Samsung S26. Follow the same steps – usually scanning a QR code or using a provisioning app.
Conclusion: Making the eSIM Switch on Samsung S26.
Adding an eSIM to your Samsung S26 isn’t complicated once you know the steps. Whether you’re scanning a QR code, using your carrier’s app, or typing in a manual activation code, the process takes just a few minutes.
From my experience, making the switch is worthwhile, especially if you:
- Travel frequently
- Want to separate work and personal numbers
- Prefer not to fiddle with tiny SIM cards
- Like the flexibility of switching carriers without waiting days
Start with the method that seems easiest for you – the carrier app approach is usually the most forgiving for first-timers. If something doesn’t work right, don’t panic. Most issues are resolved with a quick restart or by reaching out to your carrier’s support team.
Your Samsung S26 is built for this new digital SIM technology, and once you experience the convenience of adding a new plan in minutes without hunting for a paperclip to open the SIM tray, you’ll wonder why you didn’t switch sooner.
Got questions I didn’t cover? Feel free to leave them below – I’ve been through pretty much every eSIM issue imaginable,e and I’m happy to help guide you through the process.

