
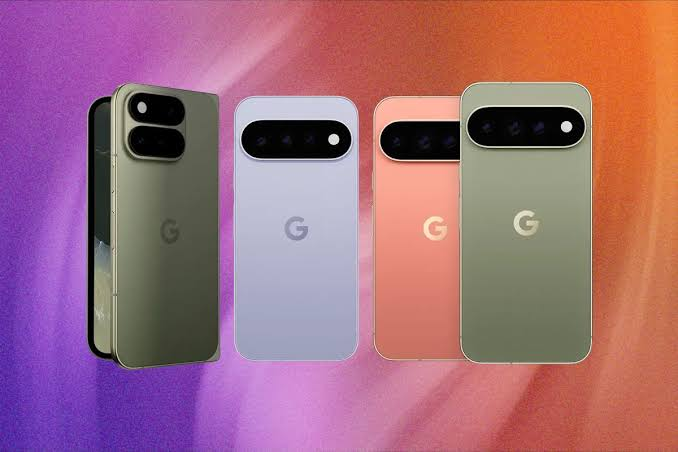
Google Pixel phones offer one of the most seamless eSIM experiences available on Android — and for good reason. As the creator of Android, Google has built eSIM support directly into the operating system at a deeper level than any other Android manufacturer. Pixel phones were among the first Android devices to support eSIM in India, and in 2026, the latest Pixel models offer some of the most advanced eSIM capabilities available.
Whether you are using a Pixel 6, Pixel 7, Pixel 8, or Pixel 9 series device, this guide covers everything you need to know about activating and using eSIM on Google Pixel in India — including Jio, Airtel, and Vi activation, dual SIM setup, and Pixel-specific features that make eSIM particularly powerful on Google’s flagship devices.
- Check now – How to Set up eSIM in Google Pixel 9a
Google Pixel eSIM Specifications — All Models
| Pixel Model | Physical SIM | eSIM | Dual eSIM | Total Numbers |
|---|---|---|---|---|
| Pixel 9 Pro Fold | ✅ nano-SIM | ✅ Yes | ✅ Yes | 3 |
| Pixel 9 Pro XL | ✅ nano-SIM | ✅ Yes | ✅ Yes | 3 |
| Pixel 9 Pro | ✅ nano-SIM | ✅ Yes | ✅ Yes | 3 |
| Pixel 9 | ✅ nano-SIM | ✅ Yes | ✅ Yes | 3 |
| Pixel 8 Pro | ✅ nano-SIM | ✅ Yes | ✅ Yes | 3 |
| Pixel 8 | ✅ nano-SIM | ✅ Yes | ✅ Yes | 3 |
| Pixel 8a | ✅ nano-SIM | ✅ Yes | ✅ Yes | 3 |
| Pixel 7 Pro | ✅ nano-SIM | ✅ Yes | ⚠️ Check variant | 2–3 |
| Pixel 7 | ✅ nano-SIM | ✅ Yes | ⚠️ Check variant | 2–3 |
| Pixel 7a | ✅ nano-SIM | ✅ Yes | ⚠️ Check variant | 2–3 |
| Pixel 6 Pro | ✅ nano-SIM | ✅ Yes | ❌ No | 2 |
| Pixel 6 | ✅ nano-SIM | ✅ Yes | ❌ No | 2 |
| Pixel 6a | ✅ nano-SIM | ✅ Yes | ❌ No | 2 |
Key advancement: Pixel 8 series and all Pixel 9 models support dual eSIM — giving users three simultaneous active numbers (1 physical SIM + 2 eSIMs). This matches Samsung’s S24 Ultra and S25 Ultra capability.
Does Your Google Pixel Support eSIM in India?
Google Pixel phones sold in India (GA-series model numbers) fully support eSIM. However, some US-purchased Pixels may have carrier restrictions.
Verify eSIM Support
Method 1 — Dial code:
Dial *#06# — if EID appears alongside the IMEI, eSIM is supported. Two EIDs = dual eSIM confirmed.
Method 2 — Settings:
Settings → Network & Internet → SIM cards → if Add eSIM or Download a SIM option appears, eSIM is ready.
Method 3 — About Phone:
Settings → About Phone → SIM status → EID present = eSIM supported.
Indian Carrier Compatibility
| Carrier | Pixel eSIM Support | Activation Method |
|---|---|---|
| Jio | ✅ Full support | MyJio app or SMS |
| Airtel | ✅ Full support | Airtel Thanks app or store |
| Vi | ✅ Full support | Vi app or store |
| BSNL | ⚠️ Limited | Store visit required |
Before Activating eSIM on Google Pixel

Checklist:
- ✅ Stable Wi-Fi connection
- ✅ Android updated to latest version (Settings → System → System update)
- ✅ EID confirmed via *#06#
- ✅ Phone unlocked (carrier-unlocked for Indian eSIM)
- ✅ QR code ready from carrier
- ✅ Active physical SIM for OTP verification
Where to Find eSIM Settings on Google Pixel
Pixel 9 series / Pixel 8 series (Android 14/15):
Settings → Network & Internet → SIM cards → Add eSIM
Pixel 7 series (Android 13/14):
Settings → Network & Internet → SIM cards → Add eSIM
Pixel 6 series (Android 12/13):
Settings → Network & Internet → SIM cards → Download a SIM
Quick access:
Pull down notification shade → tap SIM icon → SIM settings → Add eSIM
How to Activate eSIM on Google Pixel — All Methods
Method 1: QR Code Activation (Recommended)
- Open Settings
- Tap Network & Internet
- Tap SIM cards
- Tap Add eSIM (or Download a SIM)
- Tap Download a SIM instead? or Scan QR code
- Point Pixel camera at carrier QR code
- Tap Confirm when profile details appear
- Wait 30–60 seconds for download
- Tap Activate
- Follow on-screen prompts to complete setup
Pixel-specific tip: Google Pixel’s camera quality makes QR code scanning faster and more reliable than most Android phones — works at greater distance and lower light than typical Android cameras.
Method 2: Activation Code (Manual)
- Settings → Network & Internet → SIM cards
- Tap Add eSIM
- Select Enter activation code
- Type or paste code from carrier
- Follow prompts to complete
Method 3: Jio eSIM on Google Pixel

Via MyJio App (Easiest):
- Open MyJio app
- My Account → Get eSIM
- App detects Pixel device
- Verify OTP sent to Jio number
- Follow in-app instructions
- eSIM pushed directly to Pixel
Via SMS:
- Dial *#06# → note EID (last 15 digits)
- Send “SIMCHG <15-digit EID>” to 199
- Reply 1 to confirm
- Receive QR code → scan via Method 1
Via Jio Store:
Visit with Pixel device and Aadhaar → 10–15 minute activation.
Method 4: Airtel eSIM on Google Pixel
Via Airtel Thanks App:
- Open Airtel Thanks
- Account → Switch to eSIM
- App detects Pixel → provides QR or pushes directly
- Verify OTP
- Scan QR or confirm push → done
Via Airtel Store:
Visit with Pixel and valid ID → instant activation.
Method 5: Vi eSIM on Google Pixel
Via Vi App:
- Open Vi app
- My Account → SIM Services → Get eSIM
- Verify OTP
- Complete in-app activation
Method 6: Google’s Built-In eSIM Transfer (Pixel Exclusive)
Google Pixel has a unique feature unavailable on Samsung or iPhone — built-in eSIM transfer between Pixel devices:
Transfer eSIM from old Pixel to new Pixel:
- During new Pixel setup → Copy apps and data
- Select Use a cable or Wireless
- When prompted → Transfer SIMs
- Select which eSIM profiles to transfer
- Profiles automatically transferred to new Pixel
This eliminates the need to contact carrier for new QR code when upgrading between Pixel devices — significant convenience advantage over other Android phones.
Setting Up Dual SIM on Google Pixel

Single eSIM Setup (Pixel 6 series)
Physical SIM + 1 eSIM = 2 active numbers:
- Settings → Network & Internet → SIM cards
- Both SIMs visible — label each:
- Physical SIM → “Jio Personal”
- eSIM → “Airtel Work”
- Set defaults:
- Calls: Choose default or Ask every time
- SMS: Select primary
- Data: Choose one SIM
Dual eSIM Setup (Pixel 7/8/9 series)
Physical SIM + 2 eSIMs = 3 active numbers:
- Activate first eSIM using any method above
- Return to Settings → SIM cards → Add eSIM again
- Activate second eSIM (different carrier)
- All three SIMs visible in SIM Manager
- Label each clearly:
- Physical SIM → “Airtel Personal”
- eSIM 1 → “Jio Work”
- eSIM 2 → “Travel/International”
Best Dual/Triple SIM Setups for Pixel Users in India
Setup 1 — Personal + Work (Most Common):
- Physical: Airtel (personal calls)
- eSIM 1: Jio (work + best 5G data)
- eSIM 2: Inactive (ready for travel)
Setup 2 — Network Coverage Optimization:
- Physical: Jio 5G (data + calls)
- eSIM 1: Airtel (backup calls + 4G)
- eSIM 2: Vi (specific regional coverage)
Setup 3 — Frequent Traveler:
- Physical: Indian number (always active)
- eSIM 1: Second Indian number (work)
- eSIM 2: International travel eSIM (Airalo/Nomad — activated when traveling)
Setup 4 — Digital Nomad:
- Physical: Indian number (banking OTPs)
- eSIM 1: Current country data plan
- eSIM 2: Backup country plan
Google Pixel-Specific eSIM Features
Tensor Chip + eSIM Performance
Pixel 6 through Pixel 9 use Google’s custom Tensor chips — specifically optimized for Android’s eSIM stack. Results:
- Faster eSIM profile downloads than Qualcomm-based Android phones
- More efficient dual SIM radio management
- Lower battery impact running multiple active SIMs
Google Fi Integration
Google Fi (Google’s MVNO service) is built specifically for Pixel eSIM:
- Automatic international data switching across 200+ countries
- Single eSIM manages multiple international networks automatically
- Available to Indian Pixel users as secondary eSIM plan (check Fi availability)
- Seamless carrier switching without manual intervention
India relevance: Google Fi works excellently on Pixel for frequent international travelers — one eSIM handles connectivity globally.
Pixel’s Stock Android eSIM Advantages
Pixel’s stock Android has several eSIM advantages over manufacturer-modified Android:
Faster updates: Google delivers Android and security updates to Pixel before any other Android manufacturer — eSIM compatibility maintained for longest period.
Cleaner eSIM implementation: No manufacturer UI overlay complications — eSIM settings are exactly where Android puts them, no manufacturer customization creating confusion.
Google Wallet integration: Pixel’s tight Google Wallet integration allows eSIM profile backup and potential restoration through Google account.
Better carrier profile support: Google works directly with carriers for eSIM compatibility — Pixel often gains carrier eSIM support before other Android manufacturers.
Pixel’s “Hold for Me” + eSIM
Pixel’s exclusive “Hold for Me” feature (AI waits on hold and alerts when agent answers) works across all SIM lines — physical SIM or either eSIM.
Call Screen + Multiple SIMs
Pixel’s AI Call Screen works on incoming calls regardless of which SIM line receives the call — screens spam calls across all three active numbers simultaneously.
Personal Safety App + eSIM
Pixel’s Personal Safety emergency SOS works across all active SIM lines — emergency services reachable even if one carrier has no signal, falling back to others automatically.
Managing eSIM Profiles on Google Pixel
View All Stored Profiles
Settings → Network & Internet → SIM cards → see all active eSIMs
Switch Between Stored Profiles
- Settings → Network & Internet → SIM cards
- Tap eSIM slot
- Tap Switch or select alternate profile
- Wait 2–3 minutes for network registration
Delete eSIM Profile
- Settings → Network & Internet → SIM cards
- Long-press eSIM profile
- Tap Delete → confirm
Warning: Deletion is permanent on device. Contact carrier for re-issuance before deleting paid plans.
Export eSIM Profile (Pixel Exclusive)
Pixel running Android 14+ can export eSIM profiles for transfer to another device — unique to Pixel among Android devices:
Settings → Network & Internet → SIM cards → tap eSIM → Transfer to another device
Common eSIM Problems on Google Pixel and Fixes
“Add eSIM” option not visible
Fix 1: Update Android — Settings → System → System update → install all updates.
Fix 2: Dial *#06# — confirm EID present. No EID = this variant may not support eSIM.
Fix 3: Phone may be carrier-locked — contact Google Support or original carrier.
QR code scan not working
Fix: Despite Pixel’s excellent camera, QR codes printed on thermal paper (common at carrier stores) can be difficult to scan. Ask for digital QR code via email or SMS instead.
eSIM shows “No service” after activation
Fix 1: Toggle Airplane Mode on/off — forces network re-registration.
Fix 2: Settings → Network & Internet → SIM cards → tap affected eSIM → Network → search manually → select carrier.
Fix 3: Restart Pixel — clears network state.
OTP not received during activation
Fix: Physical SIM must have active signal and credit. OTP goes to registered number — ensure physical SIM has network connectivity before starting activation.
Data not working on new eSIM
Fix 1: Settings → Network & Internet → SIM cards → tap eSIM → toggle Mobile data on.
Fix 2: Manual APN for Jio:
- Settings → Network & Internet → SIM cards → tap Jio eSIM → Access point names → Add:
- APN: jionet
- APN Type: default,supl,mms
- Protocol: IPv4/IPv6
Fix 3: Manual APN for Airtel:
- APN: airtelgprs.com
- APN Type: default,supl,mms
eSIM transfer failing between Pixel devices
Fix: Both devices must be on same Wi-Fi network. Ensure old Pixel has sufficient battery (above 30%). If wireless transfer fails, use USB-C cable for more reliable eSIM profile transfer.
Google Pixel eSIM vs Samsung vs iPhone — Comparison
| Feature | Google Pixel 9 | Samsung S25 Ultra | iPhone 16 |
|---|---|---|---|
| Physical SIM | ✅ | ✅ | ✅ |
| eSIM slots | 2 | 2 | 2 |
| Total numbers | 3 | 3 | 3 |
| eSIM transfer | ✅ Built-in | ⚠️ Manual | ✅ QuickStart |
| Stock Android eSIM | ✅ Cleanest | ❌ One UI overlay | N/A (iOS) |
| Google Fi support | ✅ Native | ⚠️ Limited | ⚠️ Limited |
| Update longevity | ✅ 7 years | ✅ 7 years | ✅ 6+ years |
| Indian carrier support | ✅ Full | ✅ Full | ✅ Full |
Pixel advantage: Cleanest Android eSIM implementation, native Google Fi support, built-in eSIM transfer between Pixels, fastest Android updates maintaining eSIM compatibility.
International Travel with Pixel eSIM
Google Pixel’s eSIM implementation is particularly strong for international travel:
Pre-departure setup:
- Purchase international eSIM from Airalo, Nomad, or Google Fi
- Download to eSIM slot 2 on Pixel
- Keep Indian SIM on physical slot and eSIM slot 1
At destination:
- Settings → SIM cards → activate international eSIM
- Set as default data SIM
- Indian SIMs remain active for calls and OTPs
Google Maps advantage:
Google Maps offline maps + Pixel’s eSIM switching = seamless navigation even during carrier switching.
Google Translate + eSIM:
Pixel’s Google Translate works offline — no data required for basic translation. eSIM provides data when available for enhanced features.
Buying Used Pixel in India — eSIM Checklist
Many Indian users buy Pixel phones from grey market imports. Before purchasing for eSIM use:
✅ Dial *#06# — confirm EID present
✅ Check Android version — must support eSIM (Android 9+)
✅ Verify unlock status — must be carrier-unlocked
✅ Check existing eSIM profiles — delete previous owner profiles
✅ Verify model number — some US carrier-locked variants have eSIM restricted
✅ Test physical SIM slot — ensure tray functional
✅ Factory reset before use — clean state for eSIM activation
Model numbers to look for in India:
- Pixel 9: GS9QB, GS9QW (global/India variants)
- Pixel 8: GKWS6, GKWS7 (global variants)
- Pixel 7: GPHL3, GVU6C (global variants)
Frequently Asked Questions
Which Google Pixel models support eSIM in India?
All Pixel 6 and newer models support eSIM in India. Pixel 8, 8a, 8 Pro, 9, 9 Pro, 9 Pro XL, and 9 Pro Fold support dual eSIM (3 total active numbers). Pixel 6 series supports single eSIM (2 total numbers).
Can I use Jio eSIM on Google Pixel?
Yes — Jio fully supports eSIM on all Google Pixel models. Activate through MyJio app (easiest), SMS to 199 with your EID, or visit Jio store with Aadhaar.
Does Google Pixel support dual eSIM in India?
Pixel 8 series and Pixel 9 series support dual eSIM in India — running two eSIM profiles simultaneously alongside physical SIM (3 total active numbers). Pixel 6 and 7 series vary by variant — check *#06# for two EIDs to confirm dual eSIM.
What happens to Pixel eSIM during factory reset?
Factory reset permanently deletes all eSIM profiles. Before resetting: note EID from *#06# and contact each carrier to arrange re-issuance. After reset, EID remains same — provide to carrier for new QR codes.
Can I transfer eSIM from old Pixel to new Pixel?
Yes — Pixel’s exclusive eSIM transfer feature allows moving profiles between Pixel devices during setup. This is unavailable on Samsung or other Android manufacturers. Some carrier profiles may still require new QR code despite this feature.
Is Google Pixel eSIM better than Samsung Galaxy eSIM?
Both support the same eSIM standards. Pixel’s advantages: stock Android implementation without manufacturer UI overlay, native Google Fi multi-country eSIM, faster Android updates, and built-in Pixel-to-Pixel eSIM transfer. Samsung’s advantages: more models at different price points, wider India availability, and Samsung DeX compatibility.
Conclusion
Google Pixel offers the cleanest, most feature-complete eSIM experience on Android in 2026 — stock Android’s eSIM implementation is faster, cleaner, and more regularly updated than any manufacturer-modified alternative.
For Indian Pixel users, the combination of Jio’s extensive 5G network on physical SIM, Airtel’s strong voice quality on eSIM slot 1, and an international travel eSIM ready on slot 2 creates the most flexible connectivity setup available on any Android device.
Setting up is straightforward — dial *#06# to confirm your EIDs, update Android to latest version, connect to Wi-Fi, and activate through MyJio or Airtel Thanks app. The entire process takes under 10 minutes and gives your Pixel the dual or triple SIM flexibility that makes it one of the most capable connected devices available in India.

