

Most VPN guides tell you to download an app. This one doesn’t. macOS has built-in VPN support that lets you connect to a VPN server directly through System Settings — no third-party app required, no App Store downloads, no subscriptions.
MacBook or iMac user who wants a free VPN on macOS in 2026 without installing anything, this guide is for you. We cover every native VPN protocol macOS supports, free VPN servers you can use without paying, and step-by-step configuration for each method.
Why Use macOS Built-in VPN Instead of an App?
Before getting into setup, here’s why the built-in macOS VPN option is worth knowing about:
No app installation required: Everything is configured in System Settings → VPN. No downloads, no App Store permissions, no background processes running outside your control.
Lighter on system resources: Third-party VPN apps run as background processes, consume RAM, and add to login items. The built-in macOS VPN client adds zero overhead when not actively connected.
More control over protocols: macOS’s native VPN client lets you configure IKEv2, L2TP/IPSec, and Cisco IPSec directly — with full control over server addresses, authentication settings, and DNS configuration.
No data logging by the app: Third-party VPN apps have their own privacy policies separate from the VPN server itself. Using the native macOS client means one fewer party handling your connection data.
Works on any macOS version: Built-in VPN support works on macOS Ventura, Sonoma, Sequoia, and beyond — no compatibility issues with macOS updates breaking third-party apps.
Ideal for corporate VPN: If your employer provides VPN credentials (IKEv2 or L2TP), configuring them natively in macOS is cleaner than installing a corporate VPN client.
What VPN Protocols Does macOS Support Natively?
macOS System Settings supports three VPN protocol types natively in 2026:
IKEv2 (Internet Key Exchange version 2)

The most modern and recommended protocol for macOS. IKEv2 is fast, stable, handles network switching well (switching from Wi-Fi to mobile hotspot without dropping connection), and uses strong AES encryption.
Best for: Daily use, corporate VPN, traveling between Wi-Fi networks
L2TP over IPSec (Layer 2 Tunneling Protocol)
An older but widely supported protocol. Slower than IKEv2 and considered less secure, but works with a large number of free and paid VPN servers globally.
Best for: Legacy corporate VPN connections, compatibility with older servers
Cisco IPSec
Specifically for Cisco VPN infrastructure. Primarily used in enterprise environments running Cisco ASA or similar hardware.
Best for: Corporate environments with Cisco infrastructure
Note on WireGuard: WireGuard is the fastest modern VPN protocol but is not natively supported in macOS System Settings — it requires either a third-party app or manual kernel extension installation. Covered separately later in this guide.
Free VPN Server Options for macOS Built-in VPN
The built-in macOS VPN client needs a VPN server to connect to. Here are legitimate free options:
Option 1: VPNBook (Free Public VPN Servers)
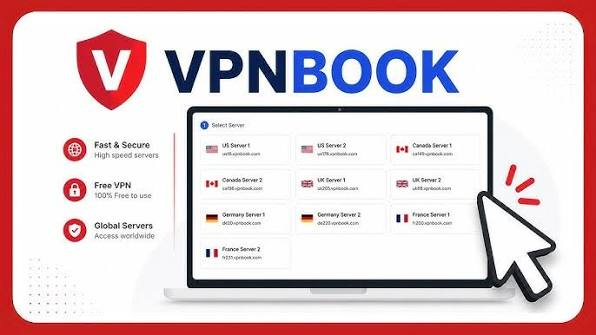
VPNBook provides free VPN servers with credentials available on their website — no account required.
- Website: vpnbook.com
- Protocols: OpenVPN and PPTP (PPTP not recommended for macOS Sequoia — use OpenVPN)
- Servers: US, UK, Canada, Germany, France, Poland
- Cost: Completely free — credentials rotate weekly
- Limitation: Slower speeds on free servers, logs connection data
Option 2: ProtonVPN Free (Manual IKEv2 Configuration)

Proton VPN’s free plan supports manual IKEv2 configuration — you can use Proton’s free servers with macOS’s built-in VPN client instead of the Proton app.
- Requires: Free ProtonVPN account at proton.me
- Protocol: IKEv2
- Servers: US, Netherlands, Japan (free tier)
- Cost: Free account required — no payment
- Advantage: Proton’s verified no-logs policy applies to manual IKEv2 connections
Option 3: Windscribe Free (Manual IKEv2/IKEv2)
Windscribe supports manual IKEv2 configuration on their free plan — 10GB/month via native macOS VPN client.
- Requires: Free Windscribe account at windscribe.com
- Protocol: IKEv2
- Servers: Multiple free locations
- Cost: Free account — 10GB/month
Option 4: Your Own VPN Server (Free with Cloud Credits)
For technically inclined users, spinning up your own VPN server on a free cloud VM (Oracle Cloud Always Free tier, or Google Cloud free trial) gives you a completely free, private VPN server you control entirely.
- Providers: Oracle Cloud (Always Free — 2 VMs permanently free), Google Cloud ($300 credit), AWS (12-month free tier)
- Setup: WireGuard or IKEv2 server installation on Ubuntu VM
- Cost: Free within tier limits
- Advantage: Maximum privacy — you control the server entirely
This option is covered in detail in the advanced section later in this guide.
Method 1: Set Up IKEv2 VPN on macOS Without App (ProtonVPN Free)
IKEv2 is the best protocol for macOS built-in VPN. This method uses ProtonVPN’s free servers — no app download required.
Step 1: Create Free ProtonVPN Account
- Go to proton.me/vpn in Safari
- Click Get Proton VPN Free
- Create an account with email — no payment required
- Verify email address
- Log in to your ProtonVPN account dashboard
Step 2: Get IKEv2 Server Details
- In the ProtonVPN dashboard, go to Downloads → Other Platforms
- Select iOS/macOS → IKEv2
- Note down the free server addresses available on your plan:
- US free server (example: us-free-01.protonvpn.net)
- Netherlands free server (example: nl-free-01.protonvpn.net)
- Japan free server (example: jp-free-01.protonvpn.net)
- Download the IKEv2 certificate from the ProtonVPN dashboard (required for authentication)
Step 3: Install ProtonVPN Certificate on macOS
- Open the downloaded certificate file (.p12 or .pem)
- Keychain Access opens automatically
- Select System keychain
- Click Add
- Enter your Mac login password when prompted
- Certificate is now trusted on your Mac ✅
Step 4: Open VPN Settings in macOS
For macOS Ventura, Sonoma, Sequoia:
- Click Apple menu → System Settings
- Click VPN in the left sidebar
- Click Add VPN Configuration
- Select IKEv2 from the dropdown
For macOS Monterey and earlier:
- Click Apple menu → System Preferences
- Click Network
- Click the + button at the bottom left
- Interface: VPN
- VPN Type: IKEv2
- Service Name: Type ProtonVPN Free US (or your chosen location)
- Click Create
Step 5: Configure IKEv2 VPN Settings
Fill in the following fields:
Server Address: Enter ProtonVPN free server address
(example: us-free-01.protonvpn.net)
Remote ID: Same as Server Address
(example: us-free-01.protonvpn.net)
Local ID: Leave blank
User Authentication: Select Username
Username: Your ProtonVPN account username
Password: Your ProtonVPN account password
Step 6: Configure Authentication Settings
- Click Authentication Settings
- Select Certificate for Machine Authentication
- Click Select and choose the ProtonVPN certificate you installed in Keychain
- Click OK
Step 7: Configure DNS (Optional but Recommended)
- In the VPN configuration, click Proxies
- No proxy needed for basic VPN
- For DNS: Close VPN settings
- Go to System Settings → Wi-Fi → Details → DNS
- Add DNS servers: 10.8.8.1 (ProtonVPN DNS) or 1.1.1.1 (Cloudflare)
- Click OK
Step 8: Connect to VPN
- In System Settings → VPN
- Toggle your new ProtonVPN configuration on
- macOS connects to the ProtonVPN free server
- VPN icon appears in menu bar ✅
- Verify at whatismyip.com — your IP should show the ProtonVPN server location.
Disconnect: Toggle the VPN configuration off in System Settings → VPN, or click the VPN icon in the menu bar → Disconnect.
Method 2: Set Up L2TP/IPSec VPN on macOS Without App (VPNBook)
L2TP/IPSec is simpler to configure than IKEv2 and works with free public servers like VPNBook.
Step 1: Get VPNBook Server Credentials
- Go to vpnbook.com in Safari
- Scroll to the Free VPN section
- Note the current username and password (rotates weekly — check the site for current credentials)
- Choose a server: US1, US2, UK, Canada, DE (Germany), FR (France), PL (Poland)
- Note the server address for your chosen location
Step 2: Open VPN Settings
macOS Ventura/Sonoma/Sequoia:
- Apple menu → System Settings → VPN
- Click Add VPN Configuration
- Select L2TP over IPSec
macOS Monterey and earlier:
- System Preferences → Network → + → VPN
- VPN Type: L2TP over IPSec
- Service Name: VPNBook US (or your chosen server)
- Click Create
Step 3: Configure L2TP Settings
Server Address: Enter VPNBook server address
(example: us1.vpnbook.com)
Account Name: Enter VPNBook username from their website
Step 4: Configure Authentication Settings
- Click Authentication Settings
- User Authentication: Select Password
- Enter VPNBook password from their website
- Machine Authentication: Select Shared Secret
- Enter shared secret: vpnbook (VPNBook’s standard shared secret)
- Click OK
Step 5: Enable “Send All Traffic Over VPN”
- Click Advanced in the VPN configuration
- Check Send all traffic over VPN connection
- Click OK
Step 6: Connect
- Toggle VPN On in System Settings → VPN
- Enter VPNBook password when prompted
- Connection established ✅
Important VPNBook note: VPNBook rotates usernames and passwords weekly. If your connection fails, visit vpnbook.com to get current credentials.
Method 3: Set Up WireGuard on macOS Without Full App (Lightweight Client)
WireGuard isn’t natively supported in macOS System Settings — but the official WireGuard app for macOS is extremely lightweight (under 5MB, minimal system footprint) and significantly lighter than full VPN apps like Proton or Windscribe.
Step 1: Download WireGuard for macOS
- Go to the Mac App Store
- Search WireGuard
- Download the official WireGuard app by WireGuard Development Team
- Install — it’s free and under 5MB
Step 2: Get a Free WireGuard Configuration
Option A: Generate from Windscribe (Free Account)
- Log in to Windscribe at windscribe.com
- Go to My Account → WireGuard Config Generator
- Select a free server location
- Download the .conf configuration file
Option B: Self-hosted WireGuard (Oracle Cloud Free)
- Create a free Oracle Cloud account (Always Free tier — 2 VMs permanently)
- Spin up an Ubuntu 22.04 VM in your chosen region
- Install WireGuard:
sudo apt install wireguard - Configure WireGuard server (full guide in Advanced section below)
- Download client config file
Option C: Mullvad WireGuard (Paid — Not Free)
Skip this — requires payment. Mentioned only for completeness.
Step 3: Import Configuration into WireGuard App
- Open the WireGuard app on macOS
- Click the + button at the bottom left
- Select Import tunnel(s) from file
- Select your downloaded .conf file
- Click Import
Step 4: Connect
- In the WireGuard app, select your tunnel
- Click Activate
- macOS asks permission to add VPN configuration — click Allow
- WireGuard connects in under 1 second ✅
Why WireGuard is worth the minimal app install: WireGuard’s performance is significantly better than IKEv2 or L2TP — lower latency, faster speeds, and better battery efficiency on MacBooks. The official WireGuard app is open source, has no tracking, and is lighter than any full VPN app.
Method 4: Set Up Your Own Free VPN Server for macOS (Advanced)
For users comfortable with basic Linux commands, setting up your own VPN server on Oracle Cloud’s Always Free tier gives you a permanently free, fully private VPN server you control completely.
Why Self-Hosted VPN?

- Completely free: Oracle Cloud Always Free gives you 2 AMD VMs permanently — no credit card charges after the free tier.
- Maximum privacy: No third-party VPN provider — only you can see your traffic.c
- No data caps: Unlimited usage within Oracle Cloud’s free bandwidth limits
- Custom location: Choose your server region (US, UK, Germany, Singapore, etc.)
Step 1: Create Oracle Cloud Free Account
- Go to cloud.oracle.com
- Click Start for Free
- Create an account — a credit card is required for verification, but Always Free resources are never charged
- Select your home region (choose closest to your target location — US East for US IP, UK for UK IP, etc.)
Step 2: Create a Free VM Instance
- In the Oracle Cloud console, go to Compute → Instances → Create Instance
- Image: Ubuntu 22.04 (recommended)
- Shape: VM.Standard.E2.1.Micro (Always Free eligible)
- Add your SSH public key (generate with:
ssh-keygen -t ed25519in macOS Terminal) - Click Create
- Note your instance’s Public IP address
Step 3: Install WireGuard on Your VM
SSH into your VM:
bash
ssh ubuntu@YOUR_VM_IPRun the WireGuard installation script:
bash
wget https://git.io/wireguard -O wireguard-install.sh
bash wireguard-install.sh
Follow the prompts:
- Client name: macbook
- Port: 51820 (default)
- DNS: 1.1.1.1 (Cloudflare)
Script generates a client configuration file and QR code.
Step 4: Download Client Config to macOS
bash
scp ubuntu@YOUR_VM_IP:~/macbook.conf ~/Desktop/Step 5: Open Firewall Port on Oracle Cloud
In the Oracle Cloud console:
- Go to Networking → Virtual Cloud Networks → Your VCN → Security Lists
- Add Ingress Rule:
- Protocol: UDP
- Port: 51820
- Save changes
Also run on your VM:
bash
sudo iptables -I INPUT -p udp --dport 51820 -j ACCEPT
sudo netfilter-persistent save
Step 6: Import Config into macOS WireGuard App
- Open WireGuard app on macOS
- Click + → Import tunnel(s) from file
- Select macbook.conf from Desktop
- Click Import → Activate
- Your traffic now routes through your private Oracle Cloud server ✅
macOS Built-in VPN vs VPN App — Full Comparison
| Feature | macOS Built-in VPN | VPN App |
|---|---|---|
| App installation | ❌ Not required | ✅ Required |
| System resources | Minimal | Moderate |
| Protocol support | IKEv2, L2TP, IPSec | IKEv2, WireGuard, OpenVPN |
| Kill switch | ❌ Not native | ✅ Most apps |
| Server switching | Manual | One-click |
| Free server options | Limited | More options |
| Privacy | No app logging | App privacy policy applies |
| Ease of setup | Technical | Simple |
| Best for | Technical users, corporate VPN | General users |
macOS VPN Setup Tips and Best Practices
Enable VPN on Demand (IKEv2 only):
macOS IKEv2 supports “Connect On Demand” — automatically connects VPN when you join untrusted Wi-Fi networks. Configure in VPN settings → Advanced → Connect On Demand → Add rules for specific SSIDs.
Add VPN to Menu Bar:
In System Settings → Control Center → VPN → Show in Menu Bar. Gives you one-click connect/disconnect without opening System Settings.
Use Strong DNS with Built-in VPN:
macOS built-in VPN doesn’t automatically set VPN provider DNS. Manually configure DNS in System Settings → Wi-Fi → Details → DNS. Use 1.1.1.1 (Cloudflare) or 9.9.9.9 (Quad9) for privacy-focused DNS.
Check for DNS Leaks:
After connecting, visit dnsleaktest.com — run the extended test. If your real ISP DNS servers appear, your DNS is leaking outside the VPN tunnel. Fix by setting DNS manually as described above.
Create Multiple VPN Configurations:
Add multiple VPN configurations in System Settings — one for each server location. Switch between them manually as needed. Label clearly: “ProtonVPN US,” “Windscribe Canada,” “Personal Oracle VM.”
Troubleshooting macOS Built-in VPN
Problem: VPN Connects But No Internet
Fix:
- Go to VPN Advanced settings
- Ensure “Send all traffic over VPN” is checked
- Disconnect and reconnect
- If still broken — check DNS settings (see DNS Leak section above)
Problem: IKEv2 Authentication Fails
Fix:
- Verify username and password are correct
- Ensure certificate is properly installed in System Keychain (not Login keychain)
- Check Server Address and Remote ID match exactly
- Try removing and recreating the VPN configuration
Problem: L2TP Connection Refused
Fix:
- Verify Shared Secret is correct
- Check server address is current (VPNBook rotates servers)
- Go to System Settings → Network — check if firewall is blocking VPN ports
- Try a different VPNBook server location
Problem: VPN Drops Frequently
Fix:
- Switch from L2TP to IKEv2 — far more stable on modern macOS
- Check Wi-Fi signal strength — weak Wi-Fi causes VPN drops
- Enable “Disconnect if idle” in VPN Advanced settings
- For IKEv2: Enable Dead Peer Detection in server configuration
Problem: VPN Not Showing in Menu Bar
Fix:
- System Settings → Control Center
- Find VPN section
- Set to “Show in Menu Bar”
- Restart macOS if menu bar item doesn’t appear after toggle
Problem: macOS Sequoia VPN Settings Location
Note for Sequoia users: VPN settings moved in macOS Sequoia:
- Old location: System Settings → VPN
- New location (Sequoia): System Settings → Network → VPN
- All configuration steps remain the same — just navigate via the Network section
Frequently Asked Questions
Q: Can I set up a free VPN on macOS without downloading any app?
Yes — macOS has built-in VPN support for IKEv2 and L2TP/IPSec protocols. Configure in System Settings → VPN using free server credentials from a ProtonVPN free account or VPNBook.
Q: Is the built-in macOS VPN as good as a VPN app?
For privacy and security — yes, often better (no app privacy policy to worry about). For convenience — VPN apps are easier to use with automatic server switching and kill switches. Built-in VPN is better for technical users who want maximum control.
Q: Does macOS built-in VPN support WireGuard?
Not natively in System Settings. The official WireGuard app for macOS is the lightest way to use WireGuard — it’s free, open source, and under 5MB.
Q: Is VPNBook safe to use on macOS?
VPNBook is a free public VPN — it’s functional but logs connection data. Use it for basic privacy on public Wi-Fi, not for sensitive activities. For better privacy, use ProtonVPN free with manual IKEv2 configuration.
Q: How do I find VPN settings on macOS Sequoia?
System Settings → Network → VPN. The location moved from the top-level VPN menu item in earlier macOS versions to inside the Network section in Sequoia.
Q: Can I use ProtonVPN free without the app on macOS?
Yes — ProtonVPN supports manual IKEv2 configuration. Create a free account, get the server addresses and certificate from their dashboard, and configure in macOS System Settings → VPN.
Q: Will using the built-in macOS VPN affect my internet speed?
All VPNs add some overhead — typically 10–30% speed reduction on free servers. IKEv2 is faster than L2TP. Self-hosted WireGuard on Oracle Cloud typically has the least speed impact of the free options covered here.
Q: Does macOS built-in VPN have a kill switch?
No — macOS’s native VPN client doesn’t include a kill switch. If the VPN drops, traffic continues through your regular connection. For kill switch functionality, a dedicated VPN app is required.
Q: How do I know if my macOS VPN is working?
Visit whatismyip.com after connecting — your displayed IP should match the VPN server location. Run dnsleaktest.com to check for DNS leaks.
Q: Is setting up a self-hosted VPN on Oracle Cloud free?
Oracle Cloud’s Always Free tier gives you 2 AMD VMs permanently free. Running a WireGuard server on one of these VMs is completely free within Oracle Cloud’s free bandwidth allowance — no charges if you stay within the Always Free limits.
Conclsion
macOS’s built-in VPN support is a powerful, underused feature that lets you protect your privacy without downloading any third-party app. For Indian MacBook users who prefer keeping their system clean of additional apps, configuring IKEv2 with ProtonVPN’s free servers is the best balance of privacy, speed, and simplicity.
For maximum privacy with zero ongoing cost, setting up your own WireGuard server on Oracle Cloud’s Always Free tier takes about 30 minutes and gives you a completely private VPN server you control — no third-party provider, no data caps, no subscriptions.
Start with Method 1 — IKEv2 with ProtonVPN free for the quickest setup. Graduate to Method 4 — self-hosted WireGuard on Oracle Cloud when you’re ready for the most powerful free VPN setup available on macOS in 2026.

