
If you just got an Apple Watch Ultra and want to set it up with an eSIM, you’re in the right place. The good news is that the process is not complicated — it just takes a few minutes and a compatible carrier plan. This guide walks you through everything from checking compatibility to activating your eSIM and using your Watch independently without your iPhone nearby.
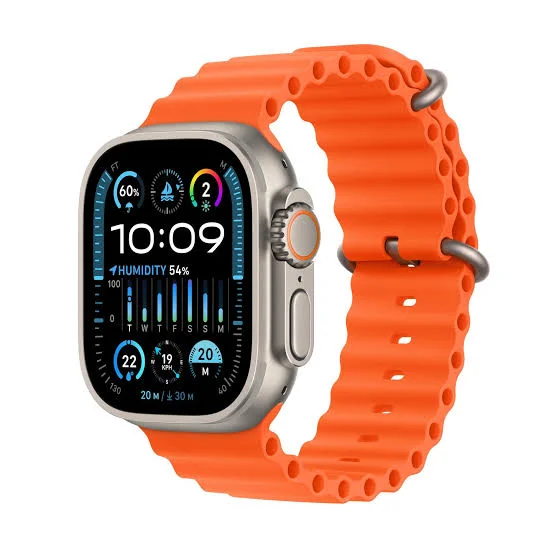
Download eSIM on Apple Watch Setting up an eSIM on your Apple Watch Ultra is one of the best ways to stay connected without carrying your iPhone everywhere. Whether you’re going for a run, hiking, traveling, or simply want the freedom to make calls, send messages, and use mobile data directly from your watch, activating an eSIM unlocks the full potential of your device.
Unlike a physical SIM card, the Apple Watch Ultra uses a built-in eSIM that must be activated through your supported mobile carrier using the Watch app on your paired iPhone. Apple Watch does not support manually installing eSIMs by scanning QR codes like many smartphones do.
In this complete guide, you’ll learn how to download and activate an eSIM on your Apple Watch Ultra, the requirements before you begin, how to troubleshoot common activation problems, and tips to ensure a smooth setup. Whether you’re using Apple Watch Ultra, Ultra 2, or a newer model, this step-by-step tutorial will help you get your cellular connection up and running in just a few minutes.
- Check now–eSIM on Apple Watch Ultra
What Is an eSIM and Why Does It Matter for Apple Watch Ultra?

An eSIM (embedded SIM) is a digital SIM card built directly into your device. Unlike a physical SIM card that you insert, an eSIM is activated digitally through your carrier.
For Apple Watch Ultra, having an eSIM is what enables the cellular feature. This means you can make calls, send messages, stream music, and receive notifications even when your iPhone is left at home or switched off. If you’re a runner, hiker, or someone who travels light, this is a game-changer.
The Apple Watch Ultra supports eSIM natively — there’s no physical SIM slot on the Watch at all. So if you want cellular on your Ultra, downloading and activating an eSIM is the only way to do it.
Before You Begin: Requirements
Make sure you have everything in place before starting:
You’ll need:
- Apple Watch Ultra (1st or 2nd generation)
- iPhone running iOS 16 or later (iPhone 6s or newer is no longer sufficient — you need an iPhone that supports cellular pairing)
- Active cellular plan that supports Apple Watch eSIM from your carrier
- Carrier that supports eSIM on Apple Watch (more on this below)
- The Watch must already be paired with your iPhone via the Apple Watch app
If you’re in India, major carriers like Airtel and Jio both support eSIM activation for Apple Watch. Airtel’s postpaid plans include a Watch add-on feature, and Jio also supports pairing via their app. You’ll typically need a postpaid connection — prepaid SIMs usually don’t support Watch eSIM.
How to Download eSIM on Apple Watch Ultra: Step-by-Step

Step 1: Open the Apple Watch App on Your iPhone
Unlock your iPhone and open the Apple Watch app. This is the app with the black watch icon — it comes pre-installed. Make sure your Watch is nearby, powered on, and paired.
Step 2: Tap on “Cellular”
In the Apple Watch app, scroll down and tap on Cellular. If this option doesn’t appear, it may mean your Watch model is GPS-only (not cellular), or your iPhone doesn’t have an active connection to the Watch.
Step 3: Tap “Set Up Cellular”
On the Cellular screen, you’ll see a button that says Set Up Cellular. Tap it.
The app will now guide you through the process. In most cases, you’ll be redirected to your carrier’s app or website to complete the plan activation. Some carriers handle this entirely within the Apple Watch app itself.
Step 4: Choose Your Carrier
A list of supported carriers will appear. Select your carrier from the list. If your carrier doesn’t show up, it either doesn’t support Apple Watch eSIM in your region or your account type isn’t eligible.
Step 5: Follow Your Carrier’s Activation Steps
This part varies by carrier.
- Airtel (India): You’ll be directed to the Airtel app or a web page. Log in with your Airtel account and choose the Watch eSIM add-on plan. Confirm your number and proceed.
- Jio (India): Similar process through the MyJio app. Select the Watch pairing option and link your existing Jio number.
- Carriers like T-Mobile, Verizon (US): The process is largely in-app. You may need to enter your account PIN or the last few digits of your SSN for verification.
Most carriers charge a small monthly add-on fee — typically ₹99–₹199/month in India or $10–$15/month in the US — to add your Watch to your existing phone plan.
Step 6: Wait for eSIM Download
Once you confirm the plan, the eSIM data is sent to your Apple Watch Ultra automatically. The Watch will display a progress bar or spinner. This usually takes 1–3 minutes. Keep the Watch close to your iPhone during this step.
Step 7: Confirm Cellular Activation
After the download is complete, your iPhone will show a confirmation screen. On your Watch, swipe up and check the Control Center — if you see the green cellular signal dots, the eSIM is active and working.
You can also go to the Cellular screen in the Apple Watch app and see the active plan listed there.
How to Test That the eSIM Is Working

Here’s a simple way to test: leave your iPhone in a different room, go outside, and check if your Watch can make a call or receive a notification. If it works, you’re all set.
Another test: open the Control Center on your Watch by swiping up. Look for the cellular icon (it looks like a small signal bar). When it glows green, your Watch is using cellular. When it’s white or gray, it’s using Wi-Fi or your iPhone’s connection.
You can also open the Maps app directly on the Watch and see if it loads without your phone — this confirms data is coming through the eSIM.
Pros and Cons of Using eSIM on Apple Watch Ultra
Pros
Freedom from your phone — You can go for a run, swim, or hike and leave your iPhone behind. Calls and messages still come through.
Emergency SOS without iPhone — This is huge. If you’re out on a trail and something goes wrong, the Watch Ultra can call emergency services or share your location even without your iPhone nearby. The Apple Watch Ultra is specifically designed for outdoor use, and the eSIM makes that practical.
Music and podcast streaming — Apps like Spotify and Apple Music can stream directly to the Watch over cellular. No need to pre-download content to the Watch storage.
Works with existing number — The eSIM shares your iPhone’s phone number. You don’t get a separate number. Anyone calling your regular number will reach you on the Watch too.
No physical SIM hassle — No tiny card, no pin tool needed. The entire setup is digital.
Cons
Costs extra — Every carrier charges an add-on fee to enable Watch cellular. This adds up over a year.
Battery drain — Using cellular on the Watch drains the battery faster than staying connected to your iPhone over Bluetooth. The Apple Watch Ultra has the best battery life of any Apple Watch, but heavy cellular use can cut it shorter than expected.
Carrier restrictions — Not all carriers support Apple Watch eSIM. Prepaid users in India often can’t use this feature at all. You may need to switch plans.
Setup requires iPhone — You can only set up the eSIM using the Apple Watch app on an iPhone. Android users cannot use Apple Watch at all, so this won’t work if you’ve switched phones.
Limited carrier switching — You can only have one eSIM plan on your Watch at a time. Switching carriers means going through the removal and re-setup process.
How to Remove or Switch an eSIM on Apple Watch Ultra
If you change carriers or want to switch plans, you’ll need to remove the existing eSIM first.
- Open the Apple Watch app on your iPhone
- Go to Cellular
- Tap your current plan
- Scroll down and tap Remove [Carrier Name] Plan
- Confirm the removal
After this, you can go through the setup process again with the new carrier. Keep in mind that removing the plan doesn’t cancel your carrier subscription — you’ll need to do that separately through your carrier’s app or customer service.
Troubleshooting Common Issues
“Set Up Cellular” option is missing
This usually means your Watch is the GPS-only version and doesn’t support cellular. Check the box — if it says “GPS” only, it won’t support eSIM.
eSIM download is stuck or failing
Restart both your iPhone and Apple Watch. Make sure both are connected to Wi-Fi. Try the setup again. If it still fails, contact your carrier — sometimes the account needs to be flagged as eSIM-eligible on the carrier’s end.
Calls aren’t connecting when iPhone is away
Check if your carrier plan is active in the Apple Watch app. Also make sure the Watch has a cellular signal — it won’t work in a basement or an area with poor network coverage.
Carrier isn’t listed in the setup
Your carrier may not support Apple Watch eSIM yet in your country. Check your carrier’s website for an updated list of supported Apple Watch models and plan types.
Comparison Table: eSIM Availability by Carrier (India)
| Carrier | eSIM Support for Apple Watch | Plan Type Required | Monthly Add-on Cost |
|---|---|---|---|
| Airtel | Yes | Postpaid | ₹99–₹149/month |
| Jio | Yes | Postpaid | ₹99/month |
| Vi (Vodafone Idea) | Limited | Postpaid | Varies |
| BSNL | No | — | — |
Pricing and availability may change. Always verify on your carrier’s official website.
FAQs: Downloading eSIM on Apple Watch Ultra
Q: Do I need a separate phone number for the Apple Watch Ultra eSIM?
No. The eSIM on your Apple Watch Ultra shares your existing iPhone number. When someone calls you, both your iPhone and Watch ring at the same time.
Q: Can I use Apple Watch Ultra eSIM without a monthly fee?
Not through a carrier. The eSIM requires an active paid cellular plan from a supported carrier. There’s no free option for cellular connectivity on the Watch.
Q: Will my Watch Ultra work if I upgrade to a new iPhone?
Yes, but you’ll need to pair the Watch with the new iPhone again. The eSIM plan usually carries over, but you may need to re-verify it through the carrier app.
Q: How many eSIM plans can I store on Apple Watch Ultra?
You can store up to 5 eSIM plans on Apple Watch Ultra (as of watchOS 10), but only one can be active at a time.
Q: Is the eSIM setup different for Apple Watch Ultra 2 vs Ultra 1?
The process is the same. Both models support cellular and use the same Apple Watch app-based setup flow.
Q: Can I use a data-only eSIM on Apple Watch Ultra?
No. Apple Watch eSIM requires a carrier plan that includes voice and data. Data-only SIMs are not supported for Apple Watch.
Q: What happens to my eSIM if I reset my Apple Watch?
If you do a full reset (erase all content and settings), the eSIM profile is removed from the Watch. You’ll need to set it up again after re-pairing with your iPhone. The carrier plan itself remains active — you’re not losing money.
Q: Can I set up eSIM on Apple Watch Ultra without my iPhone present?
No. The initial eSIM setup must be done with your iPhone and the Apple Watch app. Once set up, the Watch can work independently, but the first-time activation always needs the iPhone.
Conclusion
Setting up an eSIM on your Apple Watch Ultra takes about 5–10 minutes once you have a compatible carrier plan. The benefit — being able to leave your phone behind while still staying connected — is worth the small monthly add-on cost for most people.
If you’re using your Ultra for outdoor adventures, fitness tracking, or just want the peace of mind of being reachable without carrying your iPhone everywhere, the eSIM is the feature that makes it all possible.
Just make sure your carrier supports it, your plan is postpaid, and follow the steps above. You’ll be up and running faster than you might expect.

