
Using an eSIM on the Samsung Galaxy S20 Ultra can be a convenient way to connect to a mobile network without inserting a physical SIM card. However, eSIM support on the Galaxy S20 Ultra depends on the exact model, region, carrier, and software version. If your device supports eSIM, you can usually add a mobile plan by scanning a QR code provided by your carrier or entering the activation details manually. In this guide, you’ll learn how to check Samsung S20 Ultra eSIM compatibility, add an eSIM, activate your mobile plan, and troubleshoot common eSIM issues. Whether you’re switching from a physical SIM or adding a second mobile connection, these steps can help you get started safely and easily.
- Check the Problem Now – Samsung max vpn plans in 2026
What Exactly Is an eSIM and Why Should You Care?
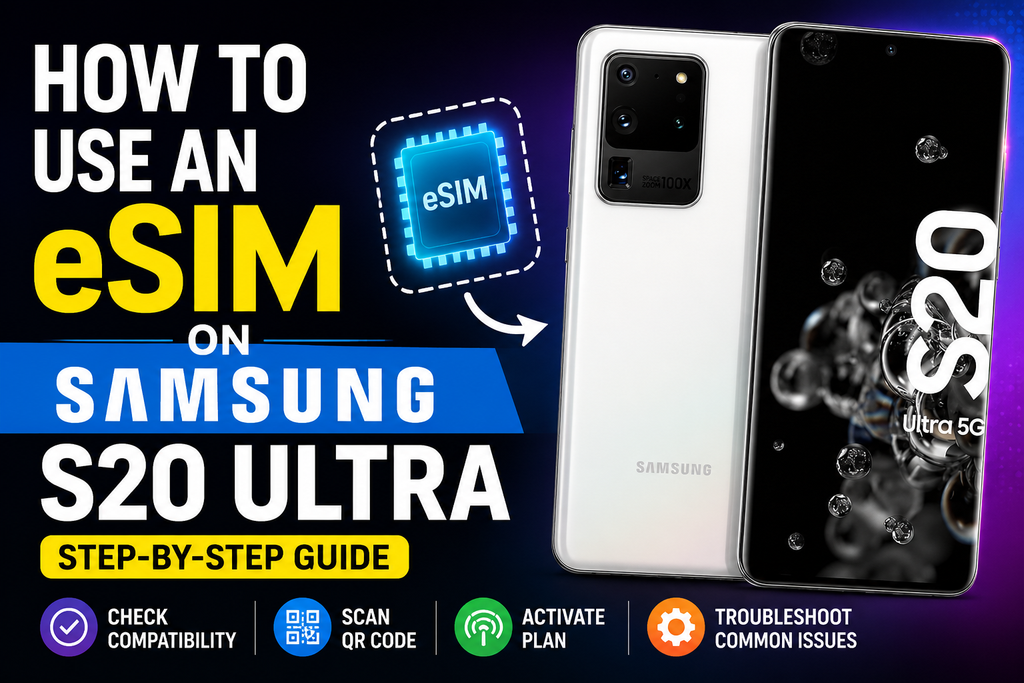
Let’s start with the basics. An eSIM stands for “embedded SIM.” It’s a digital SIM card that’s built directly into your phone’s hardware. There’s no physical card to insert, nothing to lose, and nothing to fumble with when you’re jet-lagged and tired.
eSIM on Samsung S20 Ultra. Think of it like this: your physical SIM card is like a physical key to a locker. The eSIM is like a digital key that gets sent to your phone over the internet. You download it, activate it, and suddenly you have cellular service.
The Samsung S20 Ultra supports eSIM technology, which means you can have two phone numbers on one device. You keep your regular physical SIM in the tray, and you add an eSIM for a second number or a travel data plan.
Why this matters for you:
Travel becomes infinitely easier. Instead of hunting for a local SIM card shop in a foreign country (which is always harder than it sounds), you can buy an eSIM data plan online before you even leave home. You land, turn on your eSIM, and you have data instantly.
You can have two numbers on one phone. Maybe you have a work number and a personal number. Or you want a local number when you’re traveling abroad. The S20 Ultra lets you do this without carrying two phones.
It’s more secure. If your phone gets stolen, a thief can’t just pop out your SIM card and use it in another device. The eSIM is locked to your phone.
You can switch carriers instantly. Found a better deal with another provider? You can change your eSIM plan in minutes without waiting for a physical SIM to arrive in the mail.
What You Need Before You Start
Before we dive into the setup process, let’s make sure you’ve got everything you need. I’ve seen people get stuck halfway through because they missed one of these steps.
Your Samsung S20 Ultra must be unlocked. This is crucial. If your phone is locked to a specific carrier (like you bought it on contract from AT&T or T-Mobile), you won’t be able to use an eSIM from another provider. You’ll need to contact your carrier to request an unlock code. This process typically takes a few days, so plan accordingly.
Your phone needs to be running the latest software. Samsung has improved eSIM support with software updates. Go to Settings > Software Update > Download and Install to make sure you’re on the latest version.
You need an eSIM activation code. This is usually a QR code or a manual activation code that your new carrier provides. Some carriers send this via email; others show it on their website. Don’t lose this code – you’ll need it during setup.
A stable Wi-Fi connection. You need internet access to download the eSIM profile. Airport Wi-Fi works, but hotel Wi-Fi is usually more reliable.
Your physical SIM should stay in the phone. The eSIM doesn’t replace your physical SIM – it works alongside it. Keep your main SIM in the tray.
Where to Get an eSIM Plan for Your S20 Ultra

You have several options here, and the right one depends on what you’re trying to do.
Travel eSIM providers are probably the most popular choice for S20 Ultra users. Companies like Airalo, Holafly, and Nomad specialize in selling eSIM data plans for travelers. You buy a plan for a specific country or region, they email you a QR code, and you’re set.
Example: I used Airalo when I visited Japan last year. I bought a 10GB data plan for $18, scanned the QR code, and had data working within two minutes of landing at Narita Airport. No SIM card shop, no language barrier, no hassle.
Your home carrier might also offer eSIM support. Many major carriers like T-Mobile, AT&T, and Verizon now let you switch from a physical SIM to an eSIM. This is useful if you want to free up the SIM tray for another physical SIM.
Local carriers in your destination country sometimes offer eSIM plans directly. For example, if you’re visiting the UK, you can buy an eSIM plan directly from EE or O2 through their websites. This often gives you better rates than international eSIM providers.
MVNOs (Mobile Virtual Network Operators) are smaller carriers that rent network space from the big players. They often have very competitive eSIM plans. Companies like Mint Mobile, Google Fi, and US Mobile offer eSIM support.
Step-by-Step Guide: How to Set Up Your eSIM on Samsung S20 Ultra
Alright, let’s get to the actual setup. I’m going to walk you through this step by step. Take your time and follow along.
Method 1: Setting Up with a QR Code

This is the most common method. Most eSIM providers send you a QR code that contains all the activation information.
Step 1: Open Settings
Swipe down from the top of your screen and tap the gear icon. Or find the Settings app in your app drawer.
Step 2: Navigate to Connections
In the Settings menu, tap “Connections.” This is where all your network settings live.
Step 3: Tap SIM Card Manager
Scroll down and look for “SIM Card Manager.” This is the control center for all your SIMs – both physical and digital.
Step 4: Tap Add eSIM
You’ll see an option that says “Add eSIM” or “Add mobile plan.” Tap it.
Step 5: Choose Scan QR Code
Your phone will ask how you want to add the eSIM. Select “Scan QR Code.” The camera will open.
Step 6: Scan the QR Code
Hold your phone over the QR code your provider sent you. Make sure the code is fully visible in the frame. The phone will automatically detect it and start the download process.
Step 7: Wait for the Download
Your S20 Ultra will download the eSIM profile from your provider. This usually takes about 30 seconds to a minute. Don’t close the screen or turn off your Wi-Fi.
Step 8: Follow the On-Screen Prompts
Once the download is complete, your phone will ask you to confirm the activation. Tap “Activate” and then “Continue.”
Step 9: Name Your eSIM
Give your eSIM a name so you can easily identify it. I usually name mine after the provider or the country, like “Airalo Japan” or “T-Mobile Work.”
Step 10: Confirm Your Settings
Your phone will show you which SIM is being used for calls, texts, and data. You can adjust these settings later, so just tap “Done” for now.
That’s it. You’ve just set up your eSIM. Pretty painless, right?
Method 2: Setting Up Manually (Without a QR Code)
Sometimes you don’t have a QR code. Maybe your provider emailed you an activation code instead, or you’re using a carrier that doesn’t offer QR codes. Here’s what to do.
Step 1 to 4: Follow the same steps as above to get to the “Add eSIM” screen.
Step 5: Instead of “Scan QR Code,” look for an option that says “Enter activation code” or “Enter details manually.”
Step 6: Your provider should have given you an SM-DP+ address (which looks like a web address) and an activation code. Some providers also give you a confirmation code.
Step 7: Enter these details carefully. Double-check every character – one wrong digit, and it won’t work. I learned this the hard way with a very frustrating 20-minute session.
Step 8: Tap “Activate” and wait for the download to complete.
Step 9 and 10: Follow the same naming and confirmation steps as the QR code method.
Method 3: Using Your Carrier’s App
Some carriers let you add an eSIM directly through their app. This is becoming more common, especially with major carriers.
Step 1: Download your carrier’s official app from the Google Play Store.
Step 2: Log in to your account.
Step 3: Look for an option like “Switch to eSIM” or “Activate eSIM.” This is usually in the account settings or device management section.
Step 4: Follow the app’s instructions. The carrier will typically send the eSIM profile directly to your phone without you needing to scan a QR code.
Step 5: Confirm the activation in your phone’s SIM Card Manager.
This method is usually the smoothest experience because everything is handled through the app. But it only works if your carrier supports it.
Configuring Your eSIM Settings
Once your eSIM is set up, you need to configure how your phone uses it. This is where the magic of having two SIMs really shines.
Setting Up Default SIMs
Go to Settings > Connections > SIM Card Manager. You’ll see both your physical SIM and your eSIM listed.
Here’s what each setting does:
Calls: Choose which SIM should be used for outgoing calls. You can choose one SIM, or set it to “Ask every time” – this is useful if you want to use your eSIM for international calls and your physical SIM for local calls.
Texts: Similar to calls, choose which SIM sends outgoing text messages.
Mobile Data: This is the big one. Choose which SIM provides your internet connection. When you’re traveling, you’ll want to switch mobile data to your eSIM.
Ask before using mobile data: I recommend enabling this. Your phone will ask which SIM to use for data when you start using a lot of data, which helps prevent accidental roaming charges on your physical SIM.
Using Both SIMs Simultaneously
Your S20 Ultra can handle calls and texts from both SIMs at the same time. Here’s how it works:
When someone calls you, your phone will display which SIM the call is coming from. You’ll see “Call from SIM 1” or “Call from SIM 2” on the screen. You can answer and hang up normally.
When you make a call, your phone will use the default SIM you set, or you can choose which SIM to use before dialing. There’s a small SIM icon on the dialer screen that lets you switch.
Real-world example: I keep my physical SIM for my US number and use an eSIM when I travel. When I’m abroad, my US SIM stays active for calls and texts (I just turn off mobile data roaming on it). The eSIM handles all my data and local calls. This way, I never miss an important text from home while still having affordable data.
Managing Data Roaming
This is really important and easy to mess up. If you’re not careful, roaming charges can be brutal.
On your physical SIM: Go to Settings > Connections > Mobile Networks. Make sure “Data Roaming” is turned OFF for your physical SIM when you’re traveling. This prevents your home carrier from charging you insane roaming fees.
On your eSIM: If your eSIM is a travel data plan, turn Data Roaming ON. This is how the eSIM connects to local networks to give you internet.
How to avoid confusion: In the SIM Card Manager, label your SIMs clearly. I name my physical SIM “Primary – Roaming OFF” and my eSIM “Travel – Roaming ON.” This way, I never accidentally toggle the wrong setting.
Troubleshooting Common eSIM Issues on S20 Ultra
Things don’t always go smoothly. I’ve run into several problems while testing eSIMs, and here’s how I fixed them.
Issue 1: The QR Code Isn’t Scanning
This happens more often than you’d think. Usually, it’s because the screen brightness is too low or the QR code is damaged.
Fix: Increase your screen brightness to maximum. If you’re scanning a QR code on another device’s screen, make sure that device’s brightness is also high. Hold the phone steady about 6 to 8 inches away. If it still doesn’t work, try the manual activation method with the code your provider gave you.
Issue 2: The eSIM Profile Won’t Download
Your phone might show an error during the download process. This is usually a network issue.
Fix: Make sure you’re on a stable Wi-Fi connection. If you’re in a hotel, try switching to the lobby Wi-Fi if your room connection is weak. Restart your phone and try again. If the problem persists, contact your eSIM provider – sometimes they need to resend the activation code.
Issue 3: No Service After Activation
You’ve set up the eSIM, but you’re not getting any signal.
Fix: First, check that you’ve enabled the eSIM in SIM Card Manager. Tap the eSIM and make sure it’s toggled on. Then, restart your phone. If that doesn’t work, go to Settings > Connections > Mobile Networks > Network Operators and manually select your carrier. Your eSIM provider should have told you which network to connect to.
Issue 4: Calls Are Going to the Wrong SIM
You set a default SIM for calls, but your phone keeps using the other one.
Fix: Go to SIM Card Manager and check your default settings. Make sure you’ve selected the correct SIM for calls. If you want to choose every time, select “Ask every time” in the call settings.
Issue 5: The Phone Says the eSIM Is “Not Supported”
This usually means your S20 Ultra isn’t recognized as supporting eSIM. This can happen if you bought your phone from a region where eSIM is disabled.
Fix: Update your phone software first. Many region-locked phones had eSIM disabled in earlier software versions but got it enabled in later updates. If that doesn’t work, check the phone’s model number. SM-G988U (US version) and SM-G988B (global version) both support eSIM. Some Chinese and Hong Kong versions don’t.
Pros and Cons of Using eSIM on Samsung S20 Ultra
Let’s be realistic. eSIM is great, but it’s not perfect. Here’s what I’ve found.
Pros:
Incredible convenience for travel. No more hunting for SIM cards in foreign countries. I once spent 40 minutes in a Tokyo convenience store trying to communicate with a clerk about a SIM card. Never again.
Dual SIM functionality without losing features. Some phones make you choose between two physical SIMs or an SD card. The S20 Ultra lets you keep your physical SIM and add an eSIM while still using an SD card for storage.
Easy carrier switching. Found a better deal on data? Switch providers in minutes. I switched from a prepaid eSIM to a monthly plan through the same eSIM setup without any physical cards involved.
More secure. If someone steals your phone, they can’t take your SIM and use it in another device. The eSIM is locked to your phone.
Saves physical SIM tray space. That tiny tray can be fragile. I’ve seen people bend and break them. You’re reducing wear and tear on a component that’s hard to replace.
Cons:
Not all carriers support eSIM. While it’s getting better, you’ll still find smaller carriers and some countries where eSIM simply isn’t available yet. Always check before you travel.
No physical backup. If something goes wrong with the eSIM setup, you don’t have a physical card to fall back on. You’re entirely dependent on the digital activation working.
Transferring to a new phone is tricky. Moving your eSIM to a new phone isn’t as simple as just popping out a card. You usually need to contact your carrier or go through a QR code process again.
Limited coverage in some regions. Some eSIM providers partner with local networks that have spotty coverage. I had this issue in rural Thailand – great in the city, no signal in the countryside.
Battery drain can be higher. Running two SIMs simultaneously does use slightly more battery. It’s not a huge difference, but you might notice your battery draining a bit faster.
Real-World Examples from S20 Ultra Users
Here are some situations where using an eSIM on the S20 Ultra made a real difference.
Sarah, a digital nomad: “I’m a freelance writer who travels constantly. The S20 Ultra’s eSIM has been a game-changer. I land in a country, scan a QR code from Airalo, and I have data within minutes. I’ve used this in Portugal, Thailand, and Mexico without any issues. The dual SIM setup means I can keep my US number active for clients while using the eSIM for local data.”
Mike, a business traveler: “My company gave me an eSIM plan specifically for business travel. I set it up as a second line on my S20 Ultra. Now I have my personal number and business number on one phone. I can tell at a glance who’s calling, and I don’t need to carry two phones anymore. It’s also helped me keep better track of work expenses since I use the eSIM exclusively for business data.”
Elena, a student studying abroad: “I’m in the UK for a semester. Before leaving, I bought a UK eSIM plan. It was activated before I even boarded the plane. When I landed, I turned on the eSIM and had data instantly to call my parents and let them know I’d arrived safely. My physical US SIM is still active for texts, but I turned off roaming to avoid charges.”
David, someone who just wanted a work number: “I didn’t want to give out my personal number for work. I set up an eSIM with a cheap prepaid plan, and I only give that number to colleagues. When I’m off work, I can disable the eSIM and no work calls come through. It’s perfect for work-life balance.”
Tips for Getting the Most Out of Your eSIM
These are the little things I’ve learned through trial and error that make using eSIM way easier.
Download your eSIM before you leave. Do this at home on a stable Wi-Fi connection. The activation process is much smoother when you’re relaxed in your living room, not stressed in a foreign airport.
Take a screenshot of your activation details. Save the QR code and any activation codes in your phone’s gallery. If something goes wrong, you have a backup. Email it to yourself too.
Test before you depart. Once you’ve set up your eSIM, test it while you’re still at home. Send a text, make a call, and check data connectivity. This ensures it works before you’re relying on it in another country.
Use different colors for your SIMs. In the SIM Card Manager, assign different colors to your physical SIM and eSIM. I use blue for my eSIM and green for my physical SIM. It makes it easier to see at a glance which SIM you’re using.
Set data warnings. Go to Settings > Connections > Data Usage. Set a data warning and limit for your eSIM. It’s easy to burn through data when you’re traveling, especially if you’re using navigation apps and uploading photos.
Turn off auto-update for apps. App updates can eat through data quickly. Set your Google Play Store to only update apps over Wi-Fi. You’d be surprised how much data TikTok and Instagram updates can consume.
Label your SIMs for roaming. As I mentioned earlier, label your SIMs so you know exactly what each one does. “Primary – No Roaming” and “Travel – Data Only” are clear and prevent expensive mistakes.
Keep a backup contact method. This is a pro tip I learned the hard way in Morocco. If you have only one eSIM and you’re in a country where it doesn’t work, you’re out of luck. I always have a backup option – either a physical SIM I can buy locally or a separate phone with offline maps and a messaging app.
eSIM vs. Physical SIM – Which Should You Use?

The eSIM and physical SIM use check now still on the fence; here’s how I think about it.
Use a physical SIM if:
- You frequently switch between many different phones
- Your carrier doesn’t support eSIM
- You prefer having a physical card you can see and hold
- You’re in a region where eSIM support is limited
Use an eSIM if:
- You travel internationally
- You want to have two numbers on one phone
- You like the convenience of setting up service instantly
- You’re looking for a backup data plan
- You want to avoid the hassle of physical SIM cards
The reality: Most S20 Ultra users are better off with a combination of both. Keep your primary physical SIM in the tray, and add an eSIM when you need extra coverage or travel.
Frequently Asked Questions About eSIM on S20 Ultra
Is my S20 Ultra eSIM compatible?
Most S20 Ultra models support eSIM, but there are exceptions. The phone was originally launched with eSIM support in most regions. If you have the US version (SM-G988U) or global version (SM-G988B), you should be good. If you’re not sure, go to Settings > About Phone and check your model number.
Can I use eSIM and physical SIM at the same time?
Yes, the S20 Ultra supports dual SIM standby. This means both SIMs are active, and you can receive calls and texts on both. However, only one SIM can be active for data at a time – you choose which one.
Will I lose my physical SIM when I add an eSIM?
No, the eSIM works alongside your physical SIM. You can use both simultaneously or just use the eSIM alone. Your physical SIM stays active as long as it’s in the tray.
How many eSIMs can I store on my S20 Ultra?
Your S20 Ultra can store multiple eSIM profiles, but you can only have one eSIM active at a time. You can switch between saved profiles easily in the SIM Card Manager. I have three eSIMs saved – my US travel plan, a UK plan, and a Japan plan. I just activate the one I need.
What happens to my eSIM if I reset my phone?
If you do a factory reset, your eSIM profile might be deleted. Before resetting, go to SIM Card Manager and note down your eSIM details. You’ll need to re-download the profile after the reset.
Can I transfer my eSIM to another phone?
This depends on your carrier. Some allow you to re-scan the QR code on a new device. Others require you to contact support for a new activation code. Check with your provider before switching phones.
Does using an eSIM drain battery faster?
Using two SIMs (physical and eSIM) can use slightly more battery because your phone is maintaining two connections. The difference is usually negligible – maybe 5-10% more drain over a full day.
Can I use an eSIM without a physical SIM?
Yes, you can use your S20 Ultra with just an eSIM. Remove the physical SIM or leave it in the tray but deactivate it in settings. The eSIM works perfectly as your primary connection.
Is eSIM secure from hacking?
eSIMs use the same security standards as physical SIMs. The profile is encrypted and downloaded securely. In many ways, eSIMs are more secure because no one can physically remove your SIM card.
What if my carrier doesn’t support eSIM?
Check if they have any plans to support it. Many carriers are adding eSIM support gradually. Alternatively, use a travel eSIM provider like Airalo for data and use your physical SIM for calls and texts.
Can I get a local phone number with an eSIM in another country?
Yes, many local carriers now offer eSIM plans with a local number. This is useful if you need to make local calls or receive calls while traveling. Some travel eSIM providers also offer plans with a local number.
Why is my eSIM not showing up in settings?
This usually means your phone software is outdated. Go to Software Update and install the latest version. If you’ve installed the latest update and still don’t see eSIM options, contact Samsung support.
Conclsion
The Samsung S20 Ultra’s eSIM support is one of those features you don’t know you need until you try it. Once you’ve used it for travel or for a second phone number, going back to a single physical SIM feels restrictive.
Setting it up is straightforward, especially if you follow the steps in this guide. The QR code method takes about two minutes. The manual method takes a bit longer but works just as well.
My advice? Start with a travel eSIM from a provider like Airalo. Buy a small data plan for a country you frequently visit. Set it up at home, test it, and see how it works for you. Once you experience the convenience of landing in a foreign country with immediate data, you’ll never want to go back to hunting for SIM cards again.
The days of fumbling with tiny SIM cards in airport shops are over. Your S20 Ultra is ready for the eSIM future – all it needs is for you to take that first step.
Have you set up an eSIM on your S20 Ultra yet? Or are you still using a physical SIM for everything? I’m curious to hear about your experiences, especially if you’ve traveled with an eSIM.

