
If you searched for “Apple Watch Series A” and landed here, here’s a quick heads-up before we get started: Apple doesn’t actually sell a model called “Series A.” The real lineup goes by numbers, Series 3 through Series 11, plus the SE and Ultra lines. It’s a common mix-up, especially if you’ve seen the term used loosely online or heard it from a friend.
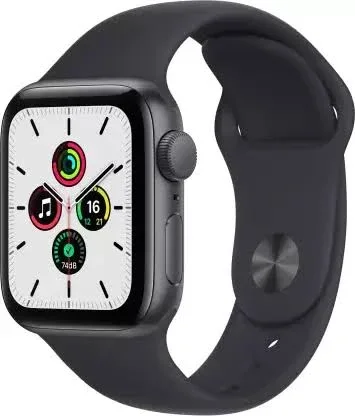
The good news is that it doesn’t really matter which exact model you have, because the eSIM download process is nearly identical across every Cellular-capable Apple Watch. So whether you’re holding a Series 9, Series 10, Series 11, SE, or an Ultra, this guide will walk you through exactly how to get your eSIM downloaded and working, along with a few tips that most guides skip.
How to download an eSIM on Apple Watch Series A Setting up an eSIM on your Apple Watch Series A allows you to stay connected even when your iPhone isn’t nearby. With a cellular-enabled Apple Watch and a compatible mobile carrier, you can make calls, send messages, stream music, receive notifications, and use apps directly from your watch. Downloading and activating an eSIM is a straightforward process, but it requires a few prerequisites, including a supported carrier, an active cellular plan, and the latest version of watchOS.
In this guide, you’ll learn how to download and activate an eSIM on your Apple Watch Series A step by step. We’ll also cover the requirements, common activation issues, troubleshooting tips, and answers to frequently asked questions to help you get your Apple Watch connected quickly and easily.
- Check now-eSIM Apple Watch no Funciona 2026
First Things First: Does Your Watch Even Support This?

Before you go hunting for cellular settings, check whether your watch is actually a Cellular model. This one detail trips up more people than anything else in the setup process.
Here’s the fastest way to tell: look at the Digital Crown, the little dial on the side of your watch. If there’s a small red ring or red dot around it, you’ve got a Cellular model, and it supports eSIM. If the crown is plain, your watch is GPS-only, and unfortunately, there’s no workaround for that. GPS-only models simply don’t have the hardware inside to connect to a mobile network on their own.
You can double-check this digitally too. Open the Watch app on your paired iPhone, go to General, then About, and look for an EID number. If it’s listed there, your watch has the cellular hardware built in.
Compatible models include: Apple Watch Series 3 and every numbered Series after it (4 through 11), all generations of the SE, and every Ultra model. As long as you bought the “GPS + Cellular” version rather than the plain “GPS” version, you’re good to go.
What You’ll Need Before You Start: How to download an eSIM on Apple Watch Series A

A little prep goes a long way here. Before diving into the setup, make sure you have:
- A Cellular Apple Watch, paired to your iPhone
- An iPhone running a reasonably current version of iOS
- A cellular plan from a carrier that actually supports Apple Watch service (not every plan does, more on this below)
- A stable Wi-Fi connection during setup, since the eSIM profile downloads over the internet, not your cellular signal
- Bluetooth turned on for both devices
One thing people often overlook: your carrier plan needs to specifically support Apple Watch. Some prepaid plans and older postpaid plans simply don’t include this feature, even if the carrier itself is a big name. It’s worth a quick call or a look at your carrier’s website before you spend time going through the setup steps.
Step-by-Step: How to Download an eSIM on Your Apple Watch

Here’s the actual process, broken down clearly.
Step 1: Open the Watch App on Your iPhone
This is where all the action happens. You won’t be doing this setup directly on the watch itself; everything is managed through the companion app on your phone.
Step 2: Tap “My Watch,” Then “Cellular”
Inside the Watch app, you’ll see tabs at the bottom. Tap “My Watch,” then look for the “Cellular” option in the list of settings.
Step 3: Tap “Set Up Cellular”
This kicks off the actual activation process. Your phone will start communicating with your carrier to get things moving.
Step 4: Log In to Your Carrier Account
You’ll be asked to sign in with your carrier credentials, the same login you’d use to check your phone bill or manage your plan online. This step confirms that you’re an actual customer and that your plan is eligible for watch service.
Step 5: Review the Terms and Fees
Most carriers charge a small monthly fee, usually somewhere between $5 and $15, to add your watch as a connected device. You’ll see this fee listed before you agree to anything, so take a second to actually read it rather than tapping through blindly.
Step 6: Wait for the eSIM Profile to Download
Once you agree to the terms, your carrier sends the eSIM profile over to your watch. This usually takes just a couple of minutes, though it can occasionally take a bit longer depending on your Wi-Fi connection and how busy your carrier’s servers are.
Step 7: Confirm Activation
You’ll get a notification once everything’s set up. Some carriers send this as a text message straight to your watch; others show it as a pop-up on your iPhone. Either way, you’ll know it worked.
Step 8: Check Your Signal
Head back into the Cellular settings inside the Watch app, and you should now see your new plan listed there. On the watch face itself, look for the signal indicator; if it shows bars or a 4G/5G icon, you’re fully connected and ready to leave your phone at home.
Practical example: Say you’re heading out for a run and don’t want to carry your phone. Once your eSIM is active, you can leave your iPhone on the kitchen counter, head out the door with just your watch, and still receive calls, reply to texts, and track your run using cellular data, all without your phone anywhere nearby.
Setting Up an eSIM in India
If you’re setting this up in India, a couple of extra details are worth knowing.
Both Airtel and Jio offer Apple Watch cellular add-ons under their own branded plans, and the process works the same way described above, through the Watch app rather than any separate app. You’ll need an existing postpaid connection with either carrier, since prepaid plans generally don’t support this feature yet.
One thing to double-check: not every circle or region has full rollout for Apple Watch cellular service, so it’s worth confirming with your carrier’s customer support before assuming it’ll work out of the box. Pricing for the add-on plan is usually modest, often bundled into existing family or multi-SIM plans rather than charged as a completely separate line item.
Common Problems and How to Fix Them
Even with a straightforward process, things occasionally go sideways. Here are the issues people run into most often, and quick fixes for each.
The Cellular option isn’t showing up at all. This almost always means your watch is a GPS-only model, or your carrier doesn’t support Apple Watch service on your current plan. Double-check the red dot on the Digital Crown, and call your carrier to confirm eligibility.
Setup gets stuck partway through. This is often a Wi-Fi issue. Try switching to a stronger network, or toggle Wi-Fi off and back on for both devices. A weak or unstable connection during the profile download is the most common culprit.
The watch shows no signal after activation. Try turning Airplane Mode on and off on the watch itself; this forces it to reconnect to the network fresh. If that doesn’t work, unpairing and re-pairing the watch, while frustrating, usually resolves stubborn connection issues.
You’re being asked for a QR code, but don’t have one. Unlike iPhones, Apple Watch cellular activation rarely uses a QR code. If you’re seeing this request, you may be trying to use a generic travel eSIM provider, which typically isn’t compatible with Apple Watch. Watch eSIMs need to come directly from a carrier partner.
Pros and Cons of Using an eSIM on Your Apple Watch
Pros:
- No need to carry your phone everywhere, especially handy for workouts, swimming, or quick errands
- Setup takes just a few minutes once you have the right plan
- You can receive calls and texts on your actual phone number, since most carriers share the same number across devices
- Switching or removing the plan later is simple, no physical SIM to swap out
Cons:
- Monthly add-on fee, typically $5 to $15 depending on your carrier
- Not every carrier or plan supports this feature; prepaid users especially may be out of luck
- Battery drains noticeably faster when cellular is active compared to Bluetooth-only mode
- Regional band restrictions mean a watch bought in one country may not work with every carrier elsewhere, which matters if you travel often
- Doesn’t work with most third-party travel eSIM providers, since activation is tied directly to your primary carrier
Managing or Removing Your eSIM Later
Plans change. Maybe you’re switching carriers, upgrading to a new watch, or just want to pause the service for a while to save on the monthly fee. Here’s how to handle the most common changes.
Switching to a new watch: You don’t need to start from scratch. Open the Watch app on your iPhone, remove the plan from your old watch, then pair your new one and repeat the Set Up Cellular steps. Many carriers now offer a direct “Transfer Plan” option that moves everything over without requiring you to log in again.
Temporarily pausing service: Rather than removing the plan entirely, most carriers let you pause the cellular add-on from their own app or website, which is handy if you know you won’t be using the watch independently for a stretch, say during a vacation where you’ll have your phone on you the whole time anyway.
Removing the plan for good: Inside the Watch app, tap Cellular, select your plan, and look for the option to remove it. This cancels the add-on with your carrier, so you’ll stop being billed for it going forward.
A Quick Note on Travel
If you’re planning to travel abroad and hoping your watch will just work like a normal phone eSIM would, temper your expectations a little. Apple Watch cellular is tied closely to your home carrier’s roaming agreements, and it doesn’t behave like the flexible travel eSIMs you might install on an iPhone before a trip. Some regions and carrier combinations simply aren’t supported yet, so if staying connected while traveling matters to you, it’s worth checking your specific route and carrier combination in advance rather than assuming it’ll just work.
For most international trips, the more reliable setup is still keeping your iPhone as the primary connected device with a travel eSIM installed on it, and letting your watch ride along over Bluetooth. That way you’re not caught off guard if your watch’s cellular service doesn’t cooperate abroad.
FAQs
How do I know if my Apple Watch supports eSIM?
Check the Digital Crown for a small red ring or dot, which indicates a Cellular model. You can also check under General, then About, in the Watch app for an EID number, which confirms cellular hardware is present.
Does my Apple Watch get its own phone number?
Usually not. Most carrier plans share your existing iPhone number across both devices, so calls and texts ring on both at the same time. Some carriers offer standalone plans with a separate number, often used for kids or family members who don’t carry a phone.
Can I use a travel eSIM from providers like Airalo or Saily on my Apple Watch?
Generally, no. Apple Watch cellular activation is tied directly to carrier partnerships and doesn’t support the QR-code style activation that most travel eSIM providers use for iPhones.
Why isn’t the Cellular option showing up in my Watch app?
Either your watch is a GPS-only model without the necessary hardware, or your current carrier plan doesn’t support Apple Watch service. Confirm both before troubleshooting further.
Is there a monthly fee for Apple Watch cellular service?
Yes, most carriers charge somewhere between $5 and $15 a month as an add-on to your existing plan. Some family or multi-line plans include it at a discount or bundle it in.
Will my Apple Watch work internationally after setup?
It depends heavily on your carrier’s roaming agreements and the specific regions you’re traveling to. Coverage isn’t guaranteed everywhere, so check compatibility for your destination before relying on it while abroad.
What happens if I remove or lose my Apple Watch after setting up cellular?
You can remove the cellular plan remotely through the Watch app on your iPhone, and most carriers allow you to transfer the same plan to a new watch later without extra hassle.
Conclsion
Downloading an eSIM onto your Apple Watch is genuinely one of the simpler tech setups you’ll do, as long as you’ve got a Cellular model and a carrier plan that supports it. The whole process usually takes less than ten minutes from start to finish. The biggest hurdle for most people isn’t the setup itself; it’s figuring out beforehand whether their specific watch and plan are actually compatible. Once that part’s confirmed, everything else tends to fall into place pretty smoothly.

