
Got a new Android phone and dreading the SIM situation? You’re not alone. Every year, more phones ship without a physical SIM slot at all, which means your number lives inside a tiny digital profile called an eSIM. Moving that profile from your old device to your new one used to feel like a small nightmare — calling your carrier, waiting on hold, hoping the QR code actually works. In 2026, it’s a lot smoother, but there are still a few steps you need to get right.
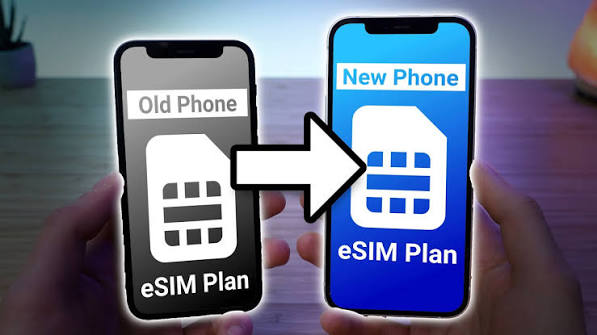
This guide walks you through every method available right now, from the built-in Android transfer tool to manual activation, plus what to do when things go wrong (because sometimes they do).
Upgrading to a new Android phone is exciting, but transferring your eSIM can seem confusing if you’ve never done it before. The good news is that most major Android manufacturers and mobile carriers now support quick and secure eSIM transfers, making the process much easier than it was just a few years ago.
Transfer eSIM to New Phone Android: Learn how to transfer an eSIM to a new Android phone in 2026, whether you’re switching between Samsung, Google Pixel, Motorola, OnePlus, or another eSIM-compatible Android device. We’ll explain the different transfer methods, carrier requirements, common troubleshooting tips, and what to do if your old phone is lost or unavailable.
By the end of this article, you’ll be able to activate your eSIM on your new Android phone and get back to making calls, sending messages, and using mobile data with minimal downtime.
- Check now the Problem – How to Transfer eSIM to New Phone Vodafone
What Exactly Is an eSIM, and Why Does Transferring It Feel Different?
A regular SIM card is physical. You pop it out of one phone and slide it into another, and you’re done in ten seconds. An eSIM (embedded SIM) is software written directly onto a chip inside your phone. There’s nothing to physically remove, which is great for durability and design, but it also means the “move” has to happen digitally — either phone-to-phone or through your carrier’s servers.
Because of that, transferring an eSIM usually involves one of three paths:
- A direct, automatic transfer between your old and new Android phones
- Scanning a fresh QR code from your carrier
- Entering activation details manually
Which one you use often comes down to your phone brand, your carrier, and a bit of luck.
Before You Start: What You’ll Need
Skipping prep is the number one reason eSIM transfers fail halfway through. Take five minutes and get these ready:
- Both phones in hand. Your old Android and your new Android should be nearby, charged, and unlocked.
- Android 12 or newer on both devices. Google’s own transfer tool requires this as a baseline, along with an updated version of Google Play Services.
- A screen lock set up on both phones. Automatic transfer won’t work without one.
- Stable WiFi on both devices, since the process pulls data and activation details over the internet, not mobile data.
- Bluetooth turned on, especially if you’re doing a device-to-device transfer rather than a QR code method.
- Your carrier account info — phone number, account PIN, and IMEI (found under Settings > About phone) — just in case you need to call support.
- A backup of your contacts, photos, and messages. Not strictly required for the eSIM itself, but you’re already juggling two phones, so back up while you’re at it.
If your device didn’t detect the transfer automatically, don’t panic — your old eSIM keeps working until the new one is confirmed active, so you’re never left without service mid-transfer.
Transfer eSIM to New Phone Android:-
Method 1: Transfer eSIM During New Phone Setup

This is the easiest route, and it’s the one most people end up using without even realizing it’s an “eSIM transfer” — it just happens as part of setting up the new phone.
- Place your old phone near the new one and power on the new device.
- Go through the on-screen setup steps until you reach the data/SIM transfer screen.
- Choose the SIM (or eSIM) you want to move over.
- Tap Transfer, then Activate.
- Wait a minute or two while the phone talks to your carrier and activates the line. Follow any extra prompts that appear.
Example: Say you’re moving from a Pixel 8 to a Pixel 10. During the initial setup wizard, Android will ask if you want to copy apps, photos, and settings from your old phone. On that same screen (or shortly after), it prompts you to transfer your SIM too. Tap through it, and within a couple of minutes your new Pixel is making calls on the same number, no carrier call required.
This method works best when both phones are recent, updated, and from carriers that support automatic eSIM handoff — T-Mobile, Verizon, and Google Fi tend to handle this smoothly in the US, for example.
Method 2: Transfer an eSIM From Settings (Without Full Setup)

Already finished setting up your new phone and just remembered you need to move the eSIM over? No need to factory reset and start again.
- Open Settings on your new phone.
- Go to Network & internet (on Pixel) or Connections (on Samsung).
- Tap SIMs, then Add SIM.
- Choose Transfer SIM from another device.
- Follow the prompts, keeping your old phone unlocked and nearby with Bluetooth enabled.
Samsung phones follow almost the same path: Settings > Connections > SIM manager > Add eSIM > Transfer SIM from another device. Confirm on your old phone when it asks, and the new eSIM should activate within a few minutes.
Method 3: Transfer Using a QR Code

If the automatic option doesn’t show up — which happens more often than you’d think — your carrier can usually issue a fresh QR code instead.
- Contact your carrier (via app, website chat, or phone call) and request an eSIM QR code for your new device.
- On your new Android phone, go to Settings > Network & internet > SIMs > Add SIM (or Connections > SIM manager > Add eSIM on Samsung).
- Select Scan a QR code from your provider.
- Point your camera at the code, confirm, and wait for activation.
Practical example: If you’re switching from an old Galaxy S22 to a new Galaxy S25 and the direct transfer keeps failing (a common issue if the old phone was already reset or wiped), calling your carrier for a new QR code is the reliable fallback. It takes about five minutes on a support chat, and the code usually arrives by email or text within seconds.
This is also the standard method if you’re switching carriers entirely, not just phones — most providers email or text the QR code once your new SIM plan is confirmed.
Method 4: Manual Activation (No QR Code Needed)
Sometimes a carrier gives you plain text details instead of a scannable code — usually an SM-DP+ address and an activation code. This happens a lot with prepaid or travel eSIM providers.
- Go to Settings > Network & internet > SIMs > Add SIM (or the Samsung equivalent).
- Choose Enter activation code manually instead of scanning.
- Type in the SM-DP+ address and the activation code exactly as provided.
- Confirm and wait for the eSIM to activate, then set it as your primary line if needed.
This method is fiddly because a single typo in the address breaks the whole thing, so copy-paste from an email rather than typing from memory whenever you can.
A Quick Note on Travel eSIMs
If you bought a travel eSIM for a trip — from a provider that sells short-term data plans for specific countries — don’t expect to move it to your new phone. Most of these plans are locked to the device they were first activated on and can’t be transferred once installed. If you upgrade phones mid-trip, you’ll typically need to purchase a fresh eSIM for your new device rather than trying to migrate the old one.
Pros and Cons of Each Transfer Method
Automatic transfer (setup or Settings menu)
- Pros: Fastest option, no calls needed, works over WiFi and Bluetooth, keeps both phones connected during the process.
- Cons: Only works if both devices run Android 12+, have a screen lock set, and your carrier actually supports it. Older or budget phones sometimes lack this feature entirely.
QR code transfer
- Pros: Reliable fallback that almost every carrier supports, doesn’t require your old phone to be nearby or even functional.
- Cons: You have to contact your carrier first, which can mean hold times or chat delays. QR codes are also often single-use, so if the scan fails you may need a brand-new one.
Manual activation
- Pros: Works even without a smartphone camera or when a QR code won’t render properly, gives you full control over the process.
- Cons: Slowest and most error-prone method since you’re typing long strings of characters by hand.
Carrier-assisted transfer
- Pros: Best option if your old phone is lost, broken, or already wiped, since the carrier handles everything from their end.
- Cons: Requires identity verification, and support wait times vary a lot depending on the provider.
Common Reasons eSIM Transfer Fails (and How to Fix Them)
- “Transfer SIM from another device” doesn’t appear. Usually means one phone is running an older Android version or outdated Google Play Services. Update both phones fully, restart them, and check again.
- The old phone was already reset. If you wiped your old device before transferring, the eSIM profile may no longer be retrievable from it. Contact your carrier for a fresh QR code instead.
- Bluetooth or WiFi drops mid-transfer. Keep both phones on the same WiFi network and close together, and don’t let either device go to sleep during the process.
- Locked device. Some carriers block eSIM transfers on phones that are still financially locked or under installment plans. Check with your carrier if this applies to you.
- QR code already used. Most activation QR codes are single-use. If it fails once, ask your carrier for a new one rather than rescanning the same code repeatedly.
If none of that works, the safest move is still a direct call or chat with your carrier — your existing line keeps working the whole time, so there’s no risk of losing service while you sort it out.
Google Pixel vs Samsung Galaxy: Any Real Differences?
The overall process is nearly identical, but the menu paths differ slightly:
- Pixel: Settings > Network & internet > SIMs > Add SIM > Transfer SIM from another device
- Samsung: Settings > Connections > SIM manager > Add eSIM > Transfer SIM from another device
Both brands support scanning a QR code or entering activation details manually if the direct transfer option isn’t available. Samsung devices sometimes show an extra confirmation step on the old phone before the new one finishes activating — just tap through the “Transfer” and “Confirm” prompts when they pop up.
FAQs About Transferring eSIM to a New Android Phone
Can I transfer my eSIM without my old phone? Yes. Contact your carrier directly, verify your identity, and they’ll send a new QR code or activation details to your new phone. You don’t need physical access to the old device for this route.
Do both phones need to be on the same WiFi network? It’s not always required, but it helps a lot. Being on the same network and physically close together with Bluetooth on makes the automatic transfer far more reliable.
Why does my new phone say “eSIM transfer failed”? This is usually caused by outdated software, a missing screen lock, or a carrier that doesn’t support the automatic method. Update both phones, set a lock screen if you haven’t, and try again — or fall back to the QR code method.
Will I lose my phone number during the transfer? No. Your old eSIM keeps working until the new one is confirmed active. There’s a brief overlap, not a gap, in most cases.
Can I transfer an eSIM between different carriers, like moving from Verizon to T-Mobile? That’s a different process called porting, not transferring. You’ll need to request your number be ported to the new carrier, who will then issue you a new eSIM QR code for your new phone.
Does transferring an eSIM cost anything? Most carriers don’t charge for standard transfers between devices on the same account. Some may charge a small SIM/eSIM swap fee if you’re changing plans or providers at the same time — worth double-checking before you start.
Can I have two eSIMs active on one phone? Yes, most modern Android phones support dual eSIM, meaning you can keep both your old and new eSIM profiles installed and just switch which one is active from Settings.
What if I’m switching from an iPhone to an Android phone? The process is different since Apple and Android handle eSIM transfers separately. In this case, it’s best to contact your carrier directly and request a new eSIM QR code for the Android device rather than trying a device-to-device transfer.
Final Thoughts
Transferring an eSIM to a new Android phone in 2026 is far less painful than it used to be, mostly because Android’s built-in transfer tool handles the heavy lifting when both devices support it. When it doesn’t work — and sometimes it just won’t, due to an older phone, a locked device, or a picky carrier — a QR code or a quick call to support will get you back online in minutes, not hours.
The main thing to remember: your old SIM keeps working the entire time you’re troubleshooting, so there’s no rush and no risk of being cut off. Take it one step at a time, keep your carrier’s support chat open in another tab just in case, and you’ll be set up on your new phone before your coffee gets cold.

