
Switching to a new phone with your Airtel eSIM requires a specific process — the eSIM profile does not move automatically. Whether your old phone is working fine or completely broken, this guide covers every method Airtel offers in 2026 to transfer your eSIM to a new device.
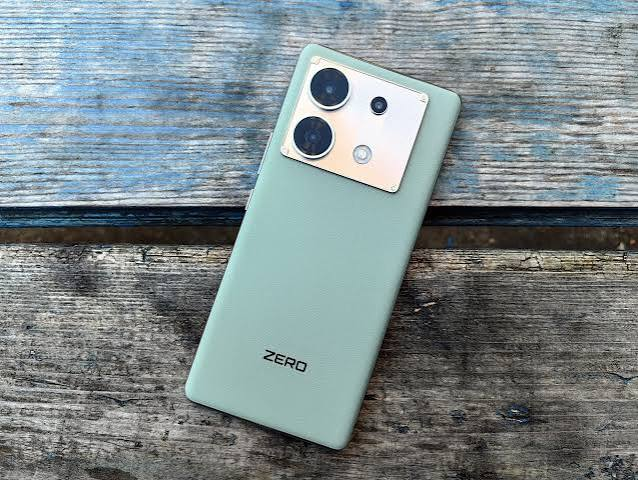
Upgrading to a new smartphone doesn’t mean you need a new mobile number. If you’re an Airtel customer using an eSIM, transferring it to your new phone is a straightforward process when you follow the correct steps. Whether you’re switching from an old Android device to a new one, moving from an iPhone to another iPhone, or changing between Android and iPhone, Airtel provides options to activate your existing eSIM on your new device.
In this guide, you’ll learn how to transfer an eSIM to a new phone on Airtel in 2026, including the requirements, step-by-step activation process, common troubleshooting tips, and solutions for activation issues. We’ll also answer frequently asked questions and share best practices to help you complete the transfer quickly while keeping your mobile number, calls, messages, and data services active.
- Airtel eSIM for India
- eSIM on Apple Watch Airtel
- Airtel Prepaid eSIM on Apple Watch
- Does Airtel support eSIM on Apple Watch?
- How to Activate eSIM on iPhone Airtel 2026
- How do I activate Airtel eSIM on Apple Watch?
- How to Set Up Airtel eSIM on Apple Watch
How to Transfer an eSIM to a New Phone on Airtel: (step by step)
What You Need to Know Before Starting
Your Airtel eSIM is tied to your carrier account on Airtel’s servers — not just stored on your phone. When you get a new phone, Airtel deactivates the eSIM on the old device and reactivates it on the new one.
Three main transfer methods:
- Airtel Thanks app — Fastest, no customer care needed
- SMS method — Works without the app
- Airtel customer care — For when other methods fail, or the old phone is broken
Before starting, have ready:
- Your Airtel mobile number
- Access to your registered email (QR code sent here)
- Your new phone’s EID number
- Aadhaar number (for identity verification if required)
- Wi-Fi available on your new phone
- Old phone accessible (for app method)
How to Find Your New Phone’s EID Number
Android:
- Settings > About Phone > SIM Card Status > EID
- Or dial *#06# — EID appears on screen
iPhone:
- Settings > General > About > EID
- Or dial *#06#
Device box:
- EID printed on retail box alongside IMEI
Phones That Support Airtel eSIM in 2026

Apple: iPhone XS and later (all models)
Samsung: Galaxy S21 series and above, Z Fold 3 and above, Z Flip 3 and above, A54, A55 (select variants)
Google Pixel: Pixel 4 and above
OnePlus: OnePlus 10 Pro, 11, 12 and above (select models)
Motorola: Edge 40 Pro, Razr series
To confirm: Check Settings for an EID number — if present, your phone supports eSIM.
Method 1: Transfer Airtel eSIM via Airtel Thanks App (Recommended)

The Airtel Thanks app is the fastest and most convenient method — no customer care calls needed.
Step 1: Initiate Transfer on Old Phone
- Open the Airtel Thanks app on your old phone
- Log in with your Airtel number
- Tap My Account (bottom right)
- Go to Manage SIM or SIM Details
- Select eSIM Settings
- Tap Transfer eSIM to new device
- Read the terms and tap Confirm
- Enter the OTP sent to your Airtel number
- eSIM deactivation on old phone begins
Step 2: Activate on New Phone
- Install the Airtel Thanks app on your new phone (Play Store / App Store)
- Open the app and tap Sign In
- Enter your Airtel number
- Enter OTP to verify (sent via SMS or WhatsApp)
- Tap My Account > Get eSIM or Activate eSIM
- Agree to terms and conditions
- Complete KYC if prompted:
- Take a selfie when asked
- Enter your Aadhaar number
- Verify with Aadhaar OTP
- Airtel sends eSIM QR code to your registered email
Step 3: Scan QR Code on New Phone

Android (Samsung): Settings > Connections > SIM Manager > Add eSIM > Scan QR Code
Android (Pixel / Other): Settings > Network & Internet > SIMs > Add SIM > Scan QR Code
iPhone: Settings > Cellular > Add eSIM > Use QR Code
- Open the QR code email on another device (laptop or another phone)
- Scan the QR code with your new phone
- Follow on-screen prompts to confirm
- Wait for activation — typically 2–4 hours, often much faster
Method 2: Transfer Airtel eSIM via SMS
This method works without the Airtel Thanks app and is useful as a backup.
Step 1: Get Your Registered Email
Send this SMS from your Airtel number: GETEMAIL to 121
Airtel replies with your registered email address. Confirm you have access to it before proceeding.
Step 2: Send eSIM Transfer Request
From your Airtel number, send: SIMCHG <your new phone’s EID> to 121
Example: SIMCHG 89910304000012345678901234567890
Replace the EID with your new phone’s actual EID number.
Step 3: Confirm the Request
Airtel sends a confirmation SMS. Reply 1 to confirm the transfer request.
Step 4: Receive and Scan QR Code
- Airtel sends an eSIM QR code to your registered email within 2–4 hours
- Scan the QR code on your new phone via Settings > SIM Manager > Add eSIM > Scan QR Code
- Follow prompts to activate
Method 3: Transfer Airtel eSIM via Customer Care
Use this method when:
- The Airtel Thanks app is not working
- You cannot access your old phone (broken or lost)
- You need to update your registered email first
Step 1: Call Airtel Customer Care
- 121 from your Airtel number
- 1800-103-4444 from any other number (toll-free)
- +91-98735-98735 for international calls
Step 2: Request eSIM Transfer
Tell the representative:
- Your Airtel mobile number
- That you want eSIM transfer to a new phone
- Your new phone’s EID number
- Your registered email address
Provide for identity verification:
- Last 4 digits of Aadhaar (or full number if requested)
- Account security PIN if set
Step 3: Receive QR Code
Airtel customer care remotely deactivates the old phone’s eSIM and sends a new QR code to your registered email. This typically takes 30 minutes to 2 hours.
Step 4: Scan and Activate
Scan the QR code on your new phone as described in Method 1, Step 3.
Method 4: Transfer Airtel eSIM via Airtel Store (Walk-In)
Visit your nearest Airtel store for in-person assistance — best when:
- You cannot access your registered email
- Remote verification fails
- Your old phone is broken, and you cannot receive OTPs
What to bring:
- New phone (with eSIM support confirmed)
- Original Aadhaar card or other KYC document
- Your Airtel mobile number
At the store:
- Tell the executive you want eSIM transfer to a new device
- They verify your identity via biometric or document verification
- Airtel activates your eSIM on the new phone at the store
- Process takes 15–30 minutes
Airtel eSIM Transfer: iPhone-Specific Steps
If you are transferring your Airtel eSIM to a new iPhone, the process has a few specific steps:
Using Airtel Thanks App on iPhone
Same as Method 1 above — download Airtel Thanks from the App Store and follow the same steps.
Scanning QR Code on iPhone
- Settings > Cellular > Add eSIM
- Tap Use QR Code
- Scan the Airtel QR code from your registered email
- Tap Continue on the confirmation screen
- Tap Add Cellular Plan
- Name your plan (e.g., “Airtel”) and set as primary or secondary
iPhone Dual SIM Setup (eSIM + Physical SIM)
- Settings > Cellular
- Both plans appear — Airtel eSIM and your physical SIM
- Set Default Line for calls and texts
- Enable Allow Cellular Data Switching for automatic data switching
Airtel eSIM Transfer: Samsung-Specific Steps
Scanning QR Code on Samsung
Settings > Connections > SIM Manager > Add eSIM > Scan QR Code
Or on newer Samsung One UI 6+: Settings > Connections > SIM Manager > Add mobile plan > Scan QR Code
Samsung Dual SIM Setup
- Settings > Connections > SIM Manager
- Both SIMs visible — Airtel eSIM and physical SIM
- Set preferred SIM for:
- Voice calls
- Messages
- Mobile data
- Label each SIM for clarity (e.g., “Airtel eSIM” / “Jio SIM”)
What to Do If You Cannot Receive OTPs
The OTP verification step can be a problem if your old eSIM is already deactivated. Here is how to handle it:
Option 1 — WhatsApp OTP: Airtel supports OTP delivery via WhatsApp in some cases. When the app asks foran OTP, look for a “Get OTP on WhatsApp” option.
Option 2 — Aadhaar OTP: If your Aadhaar is linked to a different working number, ask Airtel customer care to verify via Aadhaar OTP instead.
Option 3 — Alternative verification: Call 121 and ask for identity verification without phone OTP. Provide Aadhaar details, date of birth, and registered email for alternative verification.
Option 4 — Store visit: Visit your nearest Airtel store with your Aadhaar card. In-person biometric verification bypasses the OTP requirement entirely.
What to Do If Your Registered Email Is Inaccessible
The eSIM QR code is sent to your registered email. If you have lost access:
Step 1: Update email before transferring
- Call 121 and request an email update
- Or update in Airtel Thanks app: My Account > Profile > Edit Email
- Identity verification via Aadhaar required
Step 2: Confirm email access. Send GETEMAIL to 121 to confirm your updated email before requesting the eSIM QR code.
Step 3: Proceed with transfer.r Once email is confirmed accessible, proceed with any transfer method above.
Setting Up Dual SIM with Airtel eSIM
Many users run Airtel eSIM alongside another carrier’s physical SIM. Here is the recommended setup:
Popular combinations in India:
- Airtel eSIM (calls + data) + Jio physical SIM (backup data)
- Airtel eSIM (calls) + Jio eSIM (data) — on phones supporting dual eSIM
- Airtel eSIM (postpaid) + BSNL physical SIM (voice backup)
Android dual SIM settings: Settings > Network & Internet > SIM Manager
Set:
- Preferred for calls: Airtel eSIM (better voice quality in most cities)
- Preferred for SMS: Airtel eSIM
- Mobile data: Choose based on which offers better data speeds in your area
iPhone dual SIM settings: Settings > Cellular > Default Voice Line / Default Data Line
Enable Allow Cellular Data Switching to automatically use whichever SIM has signal when one drops.
Troubleshooting Airtel eSIM Transfer Issues
“QR Code Invalid or Expired”
Airtel QR codes expire in 24–48 hours. Fix: Call 121 or use the Airtel Thanks app to request a new QR code. Scan immediately.
“eSIM Activation Failed”
Old eSIM may still be active on the previous device. Fix: Call 121 and ask them to force-deactivate the eSIM on your old phone. Request a fresh QR code after confirmation.
“KYC Verification Failed”
Aadhaar details do not match Airtel’s records exactly. Fix: Visit the nearest Airtel store with the original Aadhaar for in-person verification.
No Network Signal After Activation
Fix:
- Restart your new phone
- Settings > Mobile Networks > Network Operators > Search manually
- Select Airtel from the list
- Toggle airplane mode off and on
- Check if 4G/5G is enabled: Settings > Mobile Network > Preferred Network Type.
“SIM Not Provisioned”
Network provisioning not yet complete. Fix: Restart phone and wait 15–30 minutes. Call 121 if no signal after 4 hours.
eSIM Downloaded But Shows “No Service”
Fix:
- Go to Settings > SIM Manager
- Confirm Airtel eSIM is enabled (toggle on)
- Confirm mobile data is enabled for Airtel eSIM
- Restart phone
Airtel Thanks App Not Showing eSIM Option
Some older app versions do not show the eSIM management section. Fix: Update Airtel Thanks app to the latest version from Play Store or App Store. The eSIM section appears in updated versions under My Account.
Airtel eSIM Activation Time in 2026
| Method | Typical Activation Time |
|---|---|
| Airtel Thanks app | 30 minutes to 2 hours |
| SMS method | 2–4 hours |
| Customer care (121) | 1–2 hours after verification |
| Airtel store walk-in | 15–30 minutes (at store) |
Most activations complete faster than the maximum times listed. If not active after 4 hours, restart your phone and call 121.
FAQs
Q: Is Airtel eSIM transfer free?
Yes. Airtel does not charge for eSIM transfer to a new device in 2026. The process is free through all methods — app, SMS, customer care, or store visit.
Q: How long does Airtel eSIM transfer take?
Via Airtel Thanks app: typically 30 minutes to 2 hours. Via SMS or customer care: 2–4 hours. Via Airtel store: 15–30 minutes, done at the store itself.
Q: Can I transfer Airtel eSIM without visiting a store?
Yes. The Airtel Thanks app method and SMS method both work remotely. A store visit is only needed if remote verification fails or you have lost access to your registered credentials.
Q: Will I lose my Airtel number during eSIM transfer?
No. Your Airtel number, plan, remaining data, and balance all carry over to the new device. Nothing changes except which device the eSIM is active on.
Q: Can I transfer Airtel eSIM from iPhone to Android?
Yes. The QR code method works across all compatible devices regardless of operating system. Airtel issues a new QR code that works on any eSIM-compatible phone.
Q: What if my old phone is broken and I cannot access the Airtel Thanks app?
Call Airtel customer care at 121 or visit an Airtel store with your Aadhaar card. Both methods allow eSIM transfer without the old phone being functional. Airtel remotely deactivates the old eSIM from their end.
Q: Does Airtel eSIM support 5G?
Yes. Airtel eSIM supports 5G on all compatible 5G devices in Airtel 5G coverage areas. Once your eSIM is active on a 5G phone, it automatically uses Airtel’s 5G network where available.
Q: Can I use Airtel eSIM and a physical SIM simultaneously?
Yes, on phones that support Dual SIM Dual Standby (DSDS). Most flagship and mid-range phones support running one eSIM and one physical SIM simultaneously. Check your phone’s specs for dual SIM support.
Q: What is the Airtel eSIM customer care number?
Call 121 from your Airtel number or 1800-103-4444 from any other number (toll-free). For international calls: +91-98735-98735.
Q: My Airtel Thanks app is showing an error during eSIM transfer — what should I do?
Update the app to the latest version first. Clear the app cache (Settings > Apps > Airtel Thanks > Clear Cache). If the error persists, use the SMS method (SIMCHG to 121) or call customer care directly.
Conclsion
Transferring your Airtel eSIM to a new phone in 2026 is straightforward when you follow the right method. For most users, the Airtel Thanks app is the fastest route — deactivate on the old phone, request the QR code, scan on the new phone, and you are done within a couple of hours.
Key things to remember:
- Keep your registered email accessible — that is where the QR code arrives
- Have your new phone’s EID ready before calling customer care or sending the SMS
- Do not use your old phone during the transfer — it can interrupt the process
- Restart your new phone if activation seems stuck after scanning
For any issues the app cannot resolve, 121 connects you to Airtel’s dedicated eSIM support team. Store visits with original Aadhaar solve any situation that remote verification cannot — including broken phones, inaccessible emails, and failed KYC.
Your Airtel number is safe. The transfer just takes a few steps.

